1. I Resurrected My Dutch Movie Review Site From 2003

    Thu 09 June 2022

    Introduction

    Between 2003 and 2006, I ran a Dutch movie review site called moevie.nl.1 I built the site and wrote the reviews. It never made any money. It cost me money to host, and it cost me a lot of time writing reviews, but I remember enjoying writing reviews about films I liked.

    The gimmick of the site was that the reviews had two parts. The first part is spoiler-free, just giving a recommendation with some context to make up your own mind. The second part contained a reflection of the movie, which included spoilers.

    moevie

    Even back then, the site didn't win any design awards (from archive.org - click to enlarge)2

    I started building the site a few months after finishing college (IT) in 2002 as I felt inept and had little confidence. Building something tangible felt like a good way to build up and demonstrate skills. And I had something to say about movies.

    Although moevie.nl did not help me gain employment as far as I know, it was fun while it lasted. At some point, I didn't get much joy out of writing movie reviews and I let the site die.

    I did keep backups of the database the code and the pictures though. And now after 18+ years I decided to resurrect the site, including all (old) reviews.

    Why resurrect a dead website gone for 16+ years?

    Rebuilding the site was just a way to spend time, a small hobby project. Something to be bussy with. The second reason is some kind of misplaced nostalgia. I sometimes regret shutting down the site, wondering what could have been if I persevered.

    Losing and regaining the domain

    Back in 2006, my hosting provider (non-profit with just a few servers) abruptly stopped operating due to hardware failure 3 and I was forced to move my domain to another company. At that time, private citizens in The Netherlands could not register an .nl domain, only businesses could, so that was a bit of a hassle.

    Not long thereafter however, I decided to let the domain expire. It was quickly scooped up by 'domain resellers'. Years later I decided that I wanted moevie.nl back, but the sellers always asked insane amounts of money.

    In 2019, I visited moevie.nl on a whim. To my surprise it didn't resolve anymore, the domain was available! I quickly scooped it up, but I didn't do much with it for a long time, until now.

    Rebuilding the site

    I really wanted to preserve the aesthetic of moevie.nl as it was back then. Especially in the context of modern web design, it does stand out. As a sore thumb - but still - I had a goal.

    Having the code and database dump is one thing, but it doesn't tell you what it actually looked like in 2003-2006. I could have tried to get the old (PHP4) code working, but I just didn't feel like it.

    Instead, I chose to visit Archive.org and indeed, it captured old snapshots of my site back in 2006. So those were of great help. The screenshots at the top of this blog post are lifted from this page on archive.org. This snapshot was taken just before I decided to close the site.

    The challenge of mobile device screens

    To set the stage a bit: the rise and fall of moevie.nl happened a year before the iPhone was first announced. Smartphones from Blackberry were popular. I had a Palm VX PDA and later a HP Compaq PDA.

    Most people didn't have mobile data connections so as far as I know, the mobile web really wasn't a thing yet.

    So moevie.nl was primarily developed for the desktop. When I thought I was finished rebuilding the site, I quickly discovered that the site was unusable on my iPhone and way too small and finicky to use on my iPad.

    For somebody who has no experience with modern web development, it was quite a steep learning-curve discovering how to deal with the various screen sizes in CSS4.

    A very large part of the entire effort of rebuilding the site was spend on making the site workable on all different device sizes. Fortunately, iOS device simulators were of great help on that front.

    Technology

    I've recreated moevie.nl with Python and Django. For the database, I chose Postgresql, although that is total overkill, I could have used SQLite without any issues.

    I chose Django because I'm quite familiar with Python so that was a straight-forward choice. I selected Postgresql mostly just to regain some knowledge about it.

    Hosting

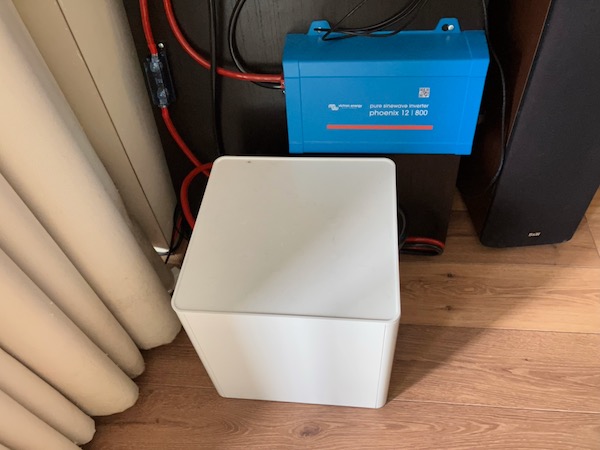
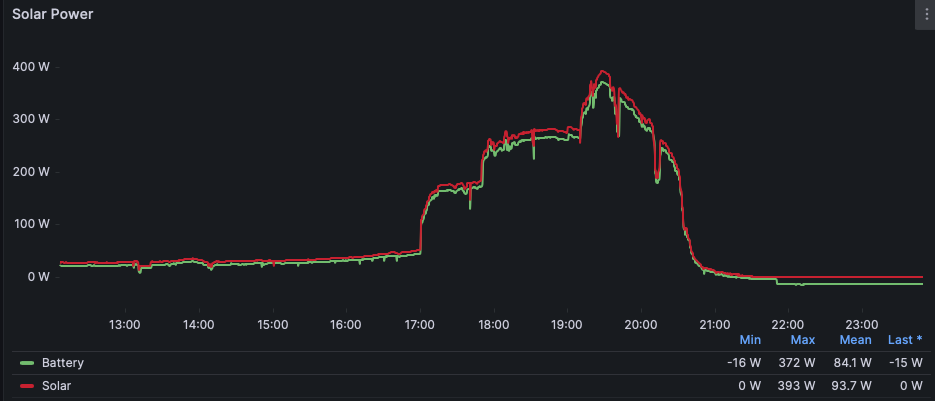
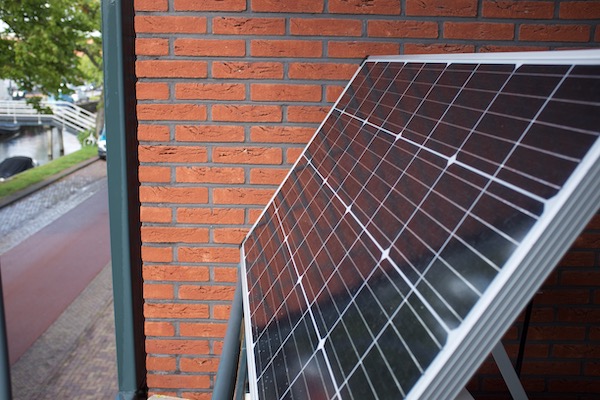
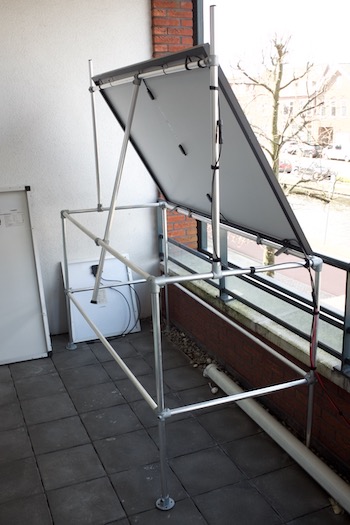
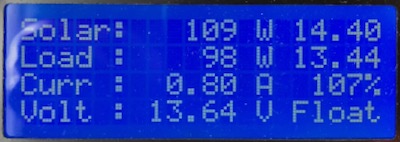
    I'm self-hosting moevie.nl on the same Raspbery Pi4 that is hosting this blog. This Raspberry Pi is powered by the sun.

    So moevie.nl is solar-powered during the day and battery-powered during the night.

    Closing words

    I'm not sure if I really want to start writing movie reviews again, knowing full well how much effort it takes. Also I'm not sure I have anything to say about movies anymore, but we'll see.

    The overall experience of rebuilding the site was frustrating at times due to the severe lack of experience and knowledge. Now that the site is done and working, even on mobile devices, that feels good.


    1. The name is based on the phonetic pronunciation in Dutch of the English word 'movie'. 

    2. sorry for the language but I could not find a better screenshot. 

    3. I was neglecting the site at that time due to losing motivation. 

    4. I admit I only tested with iOS devices so Android-based smartphones could experience issues. 

    Tagged as : web
  2. An Ode to the 10,000 RPM Western Digital (Veloci)Raptor

    Sat 30 October 2021

    Introduction

    Back in 2004, I visited a now bankrupt Dutch computer store called MyCom1, located at the Kinkerstraat in Amsterdam. I was there to buy a Western Digital Raptor model WD740, with 74 GB of capacity, running at 10,000 RPM.

    mywd

    When I bought this drive, we were still in the middle of the transition from the PATA interface to SATA2. My raptor hard drive still had a molex connector because older computer power supplies didn't have SATA power connectors.

    olds

    You may notice that I eventually managed to break off the plastic tab of the SATA power connector. Fortunately, I could still power the drive through the Molex connector.

    A later version of the same drive came with the Molex connector disabled, as you can see below.

    news

    Why did the Raptor matter so much?

    I was very eager to get this drive as it was quite a bit faster than any consumer drive on the market at that time.

    This drive not only made your computer start up faster, but it made it much more responsive. At least, it really felt like that to me at the time.

    The faster spinning drive wasn't so much about more throughput in MB/s - although that improved too - it was all about reduced latency.

    A drive that spins faster3 can complete more I/O operations per second or IOPs4. It can do more work in the same amount of time, because each operation takes less time, compared to slower turning drives.

    The Raptor - mostly focussed on desktop applications5 - brought a lot of relief for professionals and consumer enthusiasts alike. Hard disk performance, notably latency, was one of the big performance bottlenecks at the time.

    For the vast majority of consumers or employees this bottleneck would start to be alleviated only well after 2010 when SSDs slowly started to become standard in new computers.

    And that's mostly also the point of SSDs: their I/O operations are measured in micro seconds instead of milliseconds. It's not that throughput (MB/s) doesn't matter, but for most interactive applications, you care about latency. That's what makes an old computer feel as new when you swap out the hard drive for an SSD.

    The Raptor as a boot drive

    For consumers and enthusiast, the Raptor was an amazing boot drive. The 74 GB model was large enough to hold the operating system and applications. The bulk of the data would still be stored on a second hard drive either also connected through SATA or even still through PATA.

    Running your computer with a Raptor for the boot drive, resulted in lower boot times and application load times. But most of all, the system felt more responsive.

    And despite the 10,000 RPM speed of the platters, it wasn't that much louder than regular drives at the time.7.

    In the video above, a Raspberry Pi4 boots from a 74 GB Raptor hard drive.

    Alternatives to the raptor at that time

    To put things into perspective, 10,000 RPM drives were quite common even in 2003/2004 for usage in servers. The server-oriented drives used the SCSI interface/protocol which was incompatible with the on-board IDE/SATA controllers.

    Some enthusiasts - who had the means to do so - did buy both the controller8 and one or more SCSI 'server' drives to increase the performance of their computer. They could even get 15,000 RPM hard drives! These drives however, were extremely loud and had even less capacity.

    The Raptor did perform remarkably well in almost all circumstances, especially those who mattered to consumers and consumer enthusiasts alike. Suddenly you could get SCSI/Server performance for consumer prices.

    The in-depth review of the WD740 by Techreport really shows how significant the raptor was.

    The Velociraptor

    The Raptor eventually got replaced with the Velociraptor. The Velociraptor had a 2.5" formfactor, but it was much thicker than a regular 2.5" laptop drive. Because it spun at 10,000 RPM, the drive would get hot and thus it was mounted in an 'icepack' to disipate the generated heat. This gave the Velociraptor a 3.5" formfactor, just like the older Raptor drives.

    velociraptor

    In the video below, a Raspberry Pi4 boots from a 500 GB Velociraptor hard drive.

    Benchmarking the (Veloci)raptor

    Hard drives do well with sequential read/write patterns, but their performance implodes when the data access pattern becomes random. This is due to the mechanical nature of the device. That random access pattern is where 10,000 RPM outperform their slower turning siblings.

    Random 4K read performance showing both IOPs and latency. This is kind of a worst-case benchmark to understand the raw I/O and latency performance of a drive.

    fios

    Drive ID Form Factor RPM Size (GB) Description
    ST9500423AS 2.5" 7200 500 Seagate laptop hard drive
    WD740GD-75FLA1 3.5" 10,000 74 Western Digital Raptor WD740
    SAMSUNG HD103UJ 3.5" 7200 1000 Samsung Spintpoint F1
    WDC WD5000HHTZ 2.5" in 3.5" 10,000 500 Western Digital Velociraptor
    ST2000DM008 3.5" 7200 2000 Seagate 3.5" 2TB drive
    MB1000GCWCV 3.5" 7200 1000 HP Branded Seagate 1 TB drive

    I've tested the drives on an IBM M1015 SATA RAID card flashed to IT mode (HBA mode, no RAID firmware). The image is generated with fio-plot, which also comes with a tool to run the fio benchmarks.

    It is quite clear that both 10,000 RPM drives outperform all 7200 rpm drives, as expected.

    If we compare the original 3.5" Raptor to the 2.5" Velociraptor, the performance increase is significant: 22% more IOPs and 18% lower latency. I think that performance increase is due to a combination of the higher data density, the smaller size (r/w head is faster in the spot it needs to be) and maybe better firmware.

    Both the laptop and desktop Seagate drives seem to be a bit slower than they should be based on theory. The opposite is true for the HP (rebranded Seagate), which seem to perform better than expected for the capacity and rotational speed. I have no idea why that is. I can only speculate that because the HP drive came out of a server, that the fireware was tuned for server usage patterns.

    Closing words

    Although the performance increase of the (veloci)raptor was quite significant, it never gained wide-spread adoption. Especially when the Raptor first came to marked, its primary role was that of a boot drive because of its small capacity. You still needed a second drive for your data. So the increase in performance came at a significant extra cost.

    The Raptor and Velociraptor are now obsolete. You can get a solid state drive for $20 to $40 and even those budget-oriented SSDs will outperform a (Veloci)raptor many times over.

    If you are interested in more pictures and details, take a look at this article.

    This article was discussed on Hacker News here.

    Reddit thread about this article can be found here


    1. Mycom, a chain store with quite a few shops in all major cities in The Netherlands, went bankrupt twice, once in 2015 and finally in 2019. 

    2. We are talking about the first SATA version, with a maximum bandwidth capacity of 150 MB/s. Plenty enough for hard drives at that time. 

    3. https://en.wikipedia.org/wiki/Hard_disk_drive_performance_characteristics 

    4. https://louwrentius.com/understanding-storage-performance-iops-and-latency.html 

    5. I read that WD intended the first Raptor (34 GB version) to be used in low-end servers as a cheaper alternative to SCSI drives . After the adoption of the Raptor by computer enthusiasts and professionals, it seems that Western Digital pivoted, so the next version - the 74 GB I have - was geared more towards desktop usage. That also meant that this 74 GB model got fluid bearings, making it quieter6

    6. The 74 GB model is actually rather quiet drive at idle. Drive activity sounds rather smooth and pleasant, no rattling. 

    7. Please note that the first model, the 37 GB version, used ball bearings in stead of fluid bearings, and was reported to be significant louder. 

    8. Low-end SCSI card were often used to power flatbed scanners, Iomega ZIP drives, tape drives or other peripherals, but in order to benefit from the performance of those server hard drives, you needed a SCSI controller supporting higher bandwidth and those were more expensive. 

    Tagged as : Storage
  3. Raspberry Pi as a Router Using a Single Network Interface

    Wed 29 September 2021

    Introduction

    Disclaimer: this article is intended for consumers and hobbyists.


    If you want to run your own router at home, the Raspberry Pi 4 Model B1 can be an excelent hardware choice:

    1. it's fairly cheap
    2. it's fast enough
    3. it can saturate it's gigabit network port
    4. it is power-efficient

    The key problem it seems, is that it has only one, single network interface. If you build a router, you need at least two:

    1. The first interface connected to your internet modem/router (ideally in bridge mode)
    2. The second interface connected to your home network (probably a switch)

    So if you would use the Raspberry Pi, you would probably buy a gigabit USB3 NIC for around $20 and be done with it.

    routersetup click on the image for a larger version

    Now, what if I told you that you can build exactly the same setup by using only the single on-board network interface of the Raspberry Pi 4?

    How is that possible?

    Introducing VLANs

    Yes, I'm introducing the reader to a technology that exists since the '90s. It is widely used within businesses and other organisations.

    Because I have a sense that this technology is less well-known in circles outside IT operations, I think it may be an interesting topic to discuss.

    Understanding VLANs

    VLAN technology allows you to run different, separate networks over the same, single physical wire and on the same, single switch. This saves a lot on network cabling and the number of physical switches required if you want to operate networks that are separate from each other.

    If you want to run traffic from different networks over the same physical wire or switch, how can you identify those different traffic flows?

    With VLAN technology enabled, such network 'packets' are labeled with a tag. As the VLAN technology operates at the level of Ethernet, we should not talk about 'packets' but about 'ethernet frames'. The terminology is not important to understand the concept, I think.

    It suffices to understand that there is a tag put in front of the ethernet frame, that tells any device that supports VLANs to which network a frame and thus a packet belongs.

    This way, network traffic flows, can be distinguished from each other. And those tags are nothing fancy, they are called a VLAN ID and it is just a number between 1 and 40962.

    Managed switch

    Now that we understand the concept of VLANs, how do we use it?

    First of all, you need a managed network switch that supports VLANs.

    The cheapest switch with VLAN support I could find is the TP-LINK TL-SG105E, for around 25 euros or dollars. This is a 5-port switch, but the 8-port version is often only a few euros/dolars more.


    Juan Pedro Paredes in the comments point out that this TP-LINK switch may not be able to handle the large number of ARP requests that may arrive at the port connected to the Internet Modem. Others are quite negative about this switch in the Hacker News discussion (linked below). I'm not sure if Netgear switches, which are near the same price, fare any better.


    A switch like this has a web-based management interface that allows you to configure VLANS on the device.

    Tagged vs untagged

    In the context of VLANS, a network switch port can be in two states:

    1. Member of a particular network (VLAN) (untagged)
    2. Transporting multiple networks (VLANs) (tagged)

    If a port is just a member of a VLAN, it just behaves like any other switch port. In this mode, it can obviously only be a member of one network/VLAN. The VLAN tags are stripped off all network traffic coming out of this port.

    However, a port that is assigned 'tagged' VLAN trafic, just forwarded traffic as-is, including their VLAN tag.

    This is the trick that we use to send network packets from different networks (VLANS) to our Raspberry Pi router over a single port/wire.

    routersetup click on the image for a larger version

    So let's unpack this picture together, step by step.

    Let's imagine a (return) packet from the Internet arrives at the modem and is sent into switchport 1.

    The switch knows that any traffic on that switch port belongs to VLAN 10. Since this traffic needs to be send towards the Pi Router, it will put a tag on the packet and forwards the packet, including the tag towards the Pi on switch port 2.

    The Pi - in turn - is configured to work with VLANs just as the switch. The tag on the packet tells the Pi to wich virtual interface the packet must be send.

    A netplan configuration example to illustrate this setup:

    network:
      version: 2
      ethernets:
        enp2s0f0:
          dhcp4: no
      vlans:
        enp2s0f0.10:
           id: 10
           link: enp2s0f0
           addresses:
             - 68.69.70.71/24 (fake internet address)
           gateway4: 68.69.70.1 (fake upstream ISP router)
        enp2s0f0.20:
           id: 20
           link: enp2s0f0
           addresses:
             - 192.168.0.1/24 (internal network address, acting as gateway)
    

    As you can see, the VLAN packets that arrive as tagged packets, are send (without their tags) to a virtual network interface belonging to that particular network. Those virtual network interfaces all share the same physical interface (enp2s0f0). The virtual network interfaces are just the physical interface name with ".(VLAN ID)" added.

    From here on out, you probably understand where this is going: those two virtual network interfaces are basically similar to a setup with two physical network interfaces. So all the routing and NAT that needs to happen, just happens on those two virtual interfaces instead.

    How to work with VLANs

    To work with VLANs, you need a managed switch that supports VLANs. A managed switch has a management interface, often a web-based management interface.

    In this example, I'm using the TP-LINK TL-SG105E switch as an example. To get to this page, go to VLAN --> 802.1Q VLAN in the web interface.

    vlanconfig

    So from this table we can derive that:

    • Port 1 is an untagged member of VLAN 10
    • Port 2 is a tagged member of VLAN 10 and VLAN 20
    • Port 3 is an untagged member of VLAN 20

    Please note that it is also recommended to remove ports from VLANs they don't use. So I removed ports 1, 2 and 3 from the default VLAN 1.

    Now, if you have more devices to connect to the internal LAN on this switch, you need to configure the ports to be an untagged member of VLAN 20.

    Caveats

    Bandwidth impact

    Obviously, if you use a single interface, you only get to use the bandwidth of that sinle interface. In most cases, this is not an issue, as gigabit ethernet is full-duplex: there is physical exclusive wiring for upstream traffic and downstream traffic.

    So you might say that full-duplex gigabit ethernet has a raw throughput capacity of two gigabit/s, although we mostly don't talk about it that way.

    So when you download at 200 Mbit/s, that traffic is ingested over VLAN 10 over the incomming traffic path. It is then sent out over VLAN 20 towards your computer over VLAN 20 using the outgoing path. No problem there.

    If you would also use the Raspberry Pi as a backup server (with an attached external hard drive), the backup traffic and the internet traffic could both 'fight' for bandwidth on the same gigabit link.

    Impact on gigabit internet


    Update June 2022 I was actually able to use full Gigabit internet speed over VLANs, at around 111 MB/s. I made some mistakes during earlier testing.

    You will never get the full gigabit internet network speed if you would build this setup. It will probably max out at ~900 Mbit. (I'm assuming here that you would use x86 hardware as the Pi would not be able to handle firewalling this traffic anyway.)


    This is because most traffic is based on TCP connections and when you download, there is traffic both ways!. The download traffic is the bulk of the traffic, but there is a substantial steady stream of return packets that acknowledges to the sender that traffic has been received (if not, it would trigger a retransmission).

    Remember that in this single-port setup, the Pi uses the same gigabit port to send the return traffic to the internet over VLAN 10 and the download data towards your home computer over VLAN 20. So the size of the upstream traffic will limit your maximum download performance.

    The Raspberry Pi 4 Model B as a router

    The biggest limitation - which becomes an issue for more and more people - is performance. If you use IPTABLES on Linux for firewalling, in my experience, network throughput drops to a maximum of 650 Mbit/s.

    That's only an issue (first world problems) if you have gigabit internet or an internet speed beyond what the Pi can handle.

    If your internet speed doesn't even come close, this is not an issue at all.

    Maybe the Raspberry Pi 400 or the compute module performs better in this regard as their CPUs are clocked at higher Ghz.

    Closing words

    If it makes any sense for you to implement this setup, is only for you to decide. I'm running this kind of setup (using an x86 server) for 10 years as I can't run a second cable from my modem to the room where my router lives. For a more detailed picture of my home network setup, take a look here.

    Feel free to leave any questions of comments below.

    The hacker news discussion about this article can be found here.

    Route-on-a-stick

    I learned from the hacker news discussion that a router with just one network interface is called a router on a stick.


    1. Older models of the Raspberry Pi are significantly network bandwidth constrained. So much so, that they would not be suitable as Internet routers if your internet speed is above 100Mbit. 

    2. most cheap switches can't operate more than 32 ~ 64 VLANs maximum. Only more expensive, enterprise gear can work with the full 4096 VLANS at the same time. However, this is probably not relevant for consumers. 

    Tagged as : networking

Page 3 / 72