1. My Home Network Setup Based on Managed Switches and VLANs

    Fri 10 April 2020

    My home networking setup

    I live in a two story apartment, with on the top floor my utilities closet and my living room. The bottom floor contains a bedroom with all my servers and networking gear.

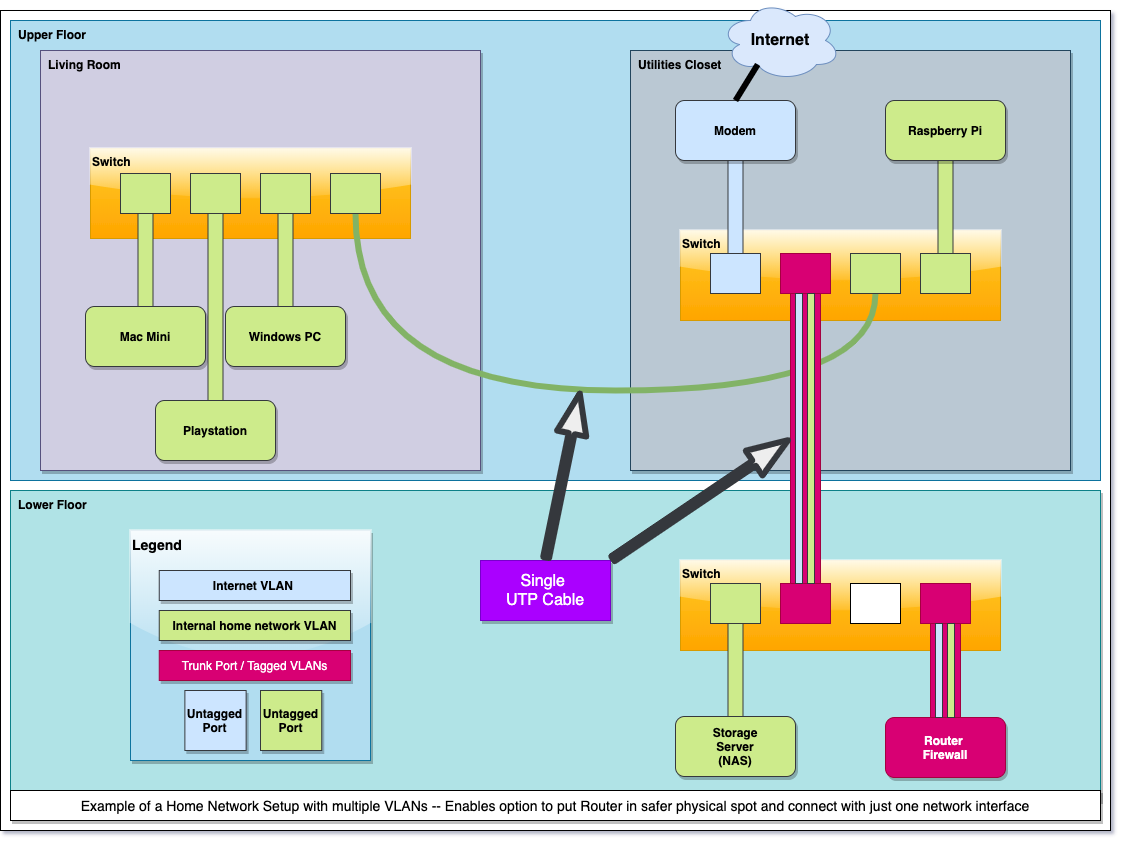
    So this is my setup (click for a bigger version):

    home

    I like to run my own router but my utilities closed is not the safest place in terms of security and climate.

    By default, most people who run their own home router will use a box with two network interfaces, one connected to the (cable) modem and the other one connected to the home network.

    I could have done the same thing, by running a cable from the modem to my router, and a second cable back up towards my closet (and livingroom).

    However, I didn't want to run multiple cables from my utilities closed to my bedroom downstairs, I saw no need for that: because I can use VLANs.

    The small 8-port switch in the closed is connected with a single (long) cable to the 24-port switch I have in my bedroom downstairs. This switch connects to my router and multiple servers.

    I've setup a trunk between these two switches where my internet traffic flows over 'VLAN 100' and my home network uses 'VLAN 200'.

    The router, an HP N40L, has only a single network interface. I just expose the two VLANS as 'tagged' and let the router route traffic between the two VLANS. No need for a second interface (as many home setups do).

    So in my setup there are two trunks, one between the two switches and the other one between the bedroom switch and my router. All other devices are connected to untagged network ports, in their appropriate VLAN.

    The small switch in the closet is responsible for carrying my home network to the switch in my living room.

    The raspberry pi connects to my smart meter to collect information about my power and gas usage.

    Tagged as : Networking
    If you have any comments email me, see the About page for contact details.
  2. The Impact of the MDADM Bitmap on RAID Performance

    Mon 06 April 2020

    Introduction

    I'm aware that most people with intensive storage workloads won't run those workloads on hard drives anymore, that ship has sailed a long time ago. SSDs have taken their place (or 'the cloud').

    For those few left who do use hard drives in Linux software RAID setups and run workloads that generate a lot of random IOPS, this may still be relevant.

    I'm not sure how much a bitmap affects MDADM software RAID arrays based on solid state drives as I have not tested them.

    The purpose of the bitmap

    By default, when you create a new software RAID array with MDADM, a bitmap is also configured. The purpose of the bitmap is to speed up recovery of your RAID array in case the array gets out of sync.

    A bitmap won't help speed up the recovery from drive failure, but the RAID array can get out of sync due to a hard reset or power failure during write operations.

    The performance impact

    During some benchmarking of various RAID arrays, I noticed very bad random write IOPS performance. No matter what the test conditions were, I got the random write performance of a single drive, although the RAID array should perform better.

    Then I noticed that the array was configured with a bitmap. Just for testing purposes, I removed the bitmap all together with:

    mdadm --grow --bitmap=none /dev/md0
    

    Random write IOPs figures improved immediately. This resource explains why:

    If  the  word internal is given, then the bitmap is stored with the metadata
    on the array, and so is replicated on all devices.
    

    So when you write data to our RAID array, the bitmap is also constantly updated. Since that bitmap lives on each drive in the array, it's probably obvious that this really deteriorates random write IOPS.

    Some examples of the performance impact

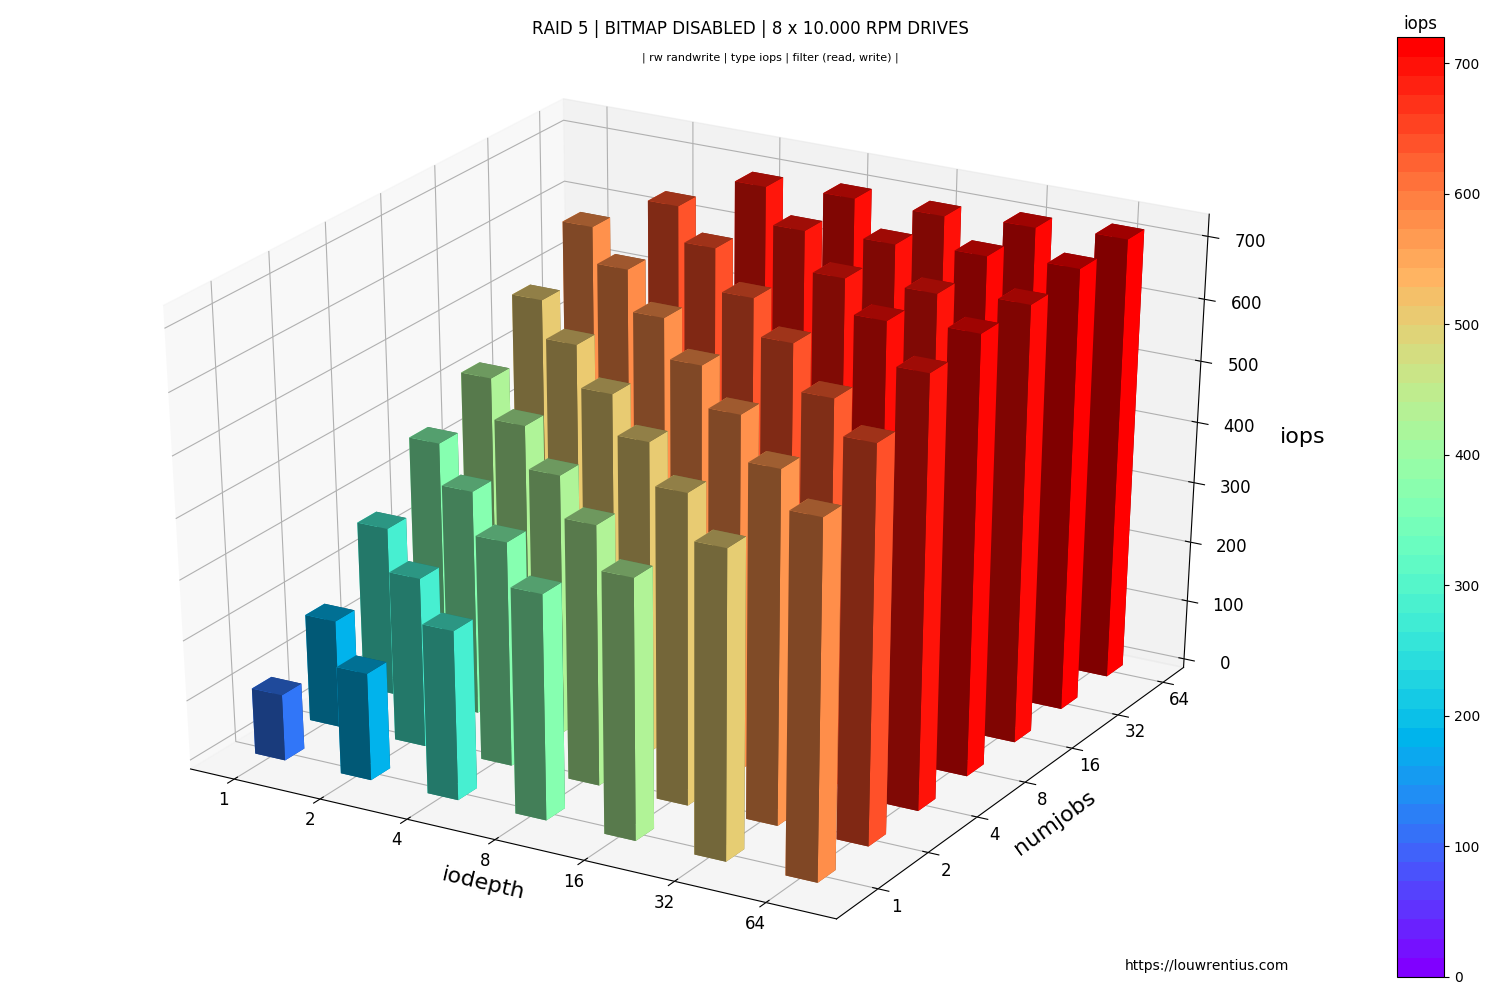
    Bitmap disabled

    An example of a RAID 5 array with 8 x 7200 RPM drives.

    nobitmap

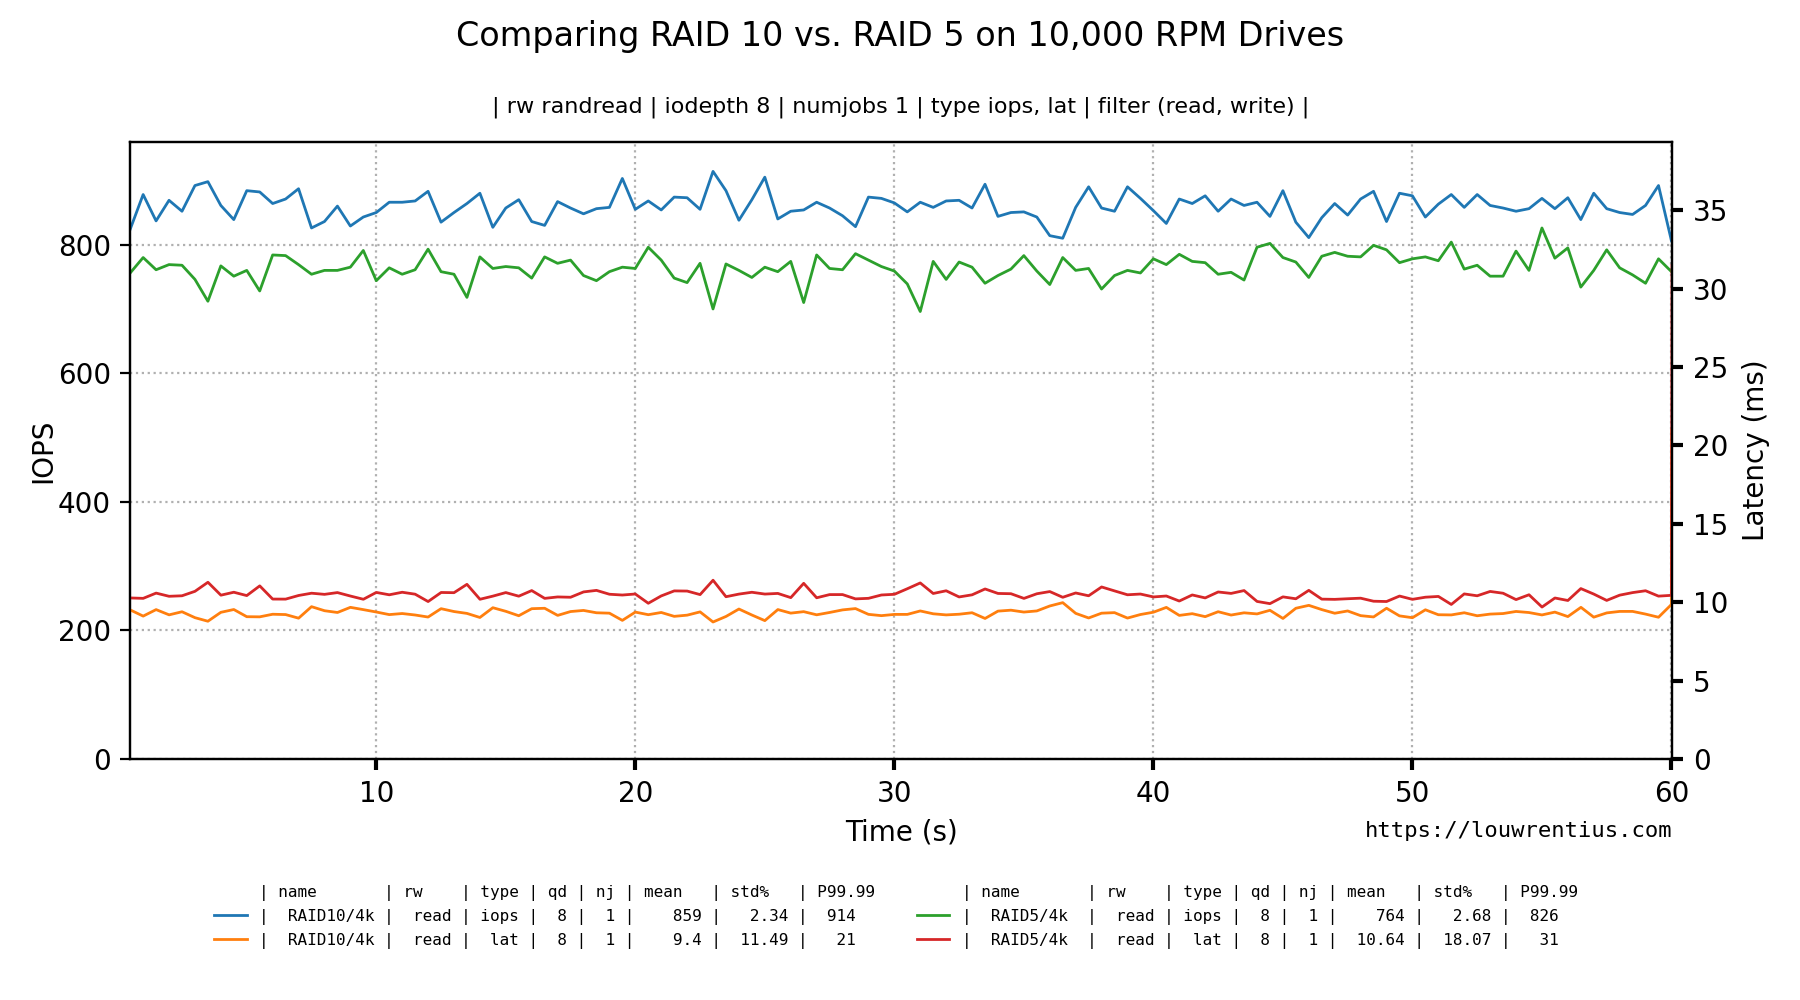
    Another example with 10.000 RPM drives:

    10knobitmap

    Bitmap enabled (internal)

    We observe significant lower random write IOPs performance overall:

    bitmapenabled

    Which is also true for 10.000 RPM drives.

    10kbitmap

    External bitmap

    You could keep the bitmap and still get great random write IOPS by putting the bitmap on a separate SSD. Since my boot device is an SSD, I tested this option like this:

    mdadm --grow --bitmap=/raidbitmap /dev/md0
    

    I noticed excellent random write IOPS with this external bitmap, similar to running without a bitmap at all. An external bitmap has it's own risks and caveats, so make sure it really fits your needs.

    Note: external bitmaps are only known to work on ext2  and  ext3. 
    Storing bitmap files on other filesystems may result in serious problems.
    

    Conclusion

    For home users who build DIY NAS servers and who do run MDADM RAID arrays, I would recommend leaving the bitmap enabled. The impact on sequential file transfers is negligible and the benefit of a quick RAID resync is very obvious.

    Only if you have a workload that would cause a ton of random writes on your storage server would I consider disabling the bitmap. An example of such a use case would be running virtual machines with a heavy write workload.

    Update on bitmap-chunks

    Based on feedback in the comments, I've performed a benchmark on a new RAID 5 array setting the --bitmap-chunk option to 128M (Default is 64M).

    The results seem to be significantly worse than the default for random write IOPS performance.

    bitmapenabled128

    Tagged as : mdadm
    If you have any comments email me, see the About page for contact details.

Page 19 / 115