In my last blog post I discussed how a small solar project - to power this blog on a Raspberry Pi - escalated into a full-blown off-grid solar setup, large enough to power the computer I use at the moment to write this update1. In this update, I want to discuss my battery upgrade.
For me, the huge lead acid battery (as pictured below) was always a relatively cheap temporary solution.
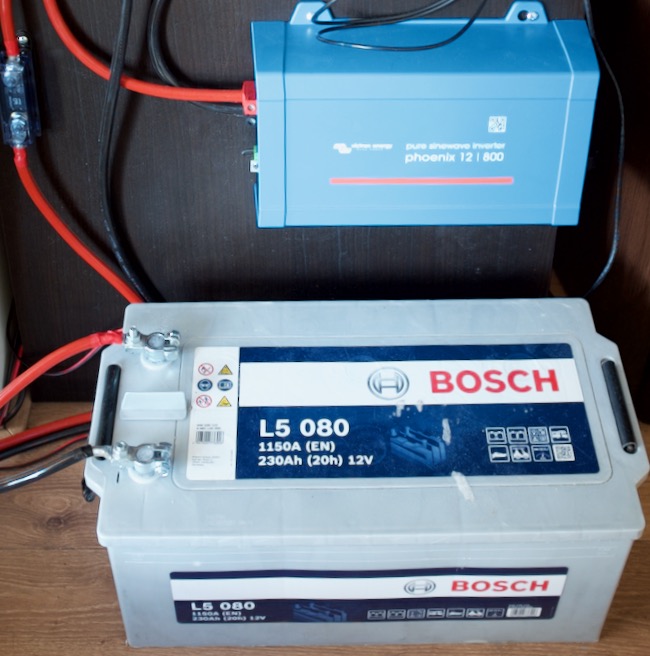 A 12 Volt 230 Ah lead-acid battery
Lead-acid batteries are not ideal for solar setups for multiple reasons, but the most problematic issue is the slow charging speed. I only have a few hours of direct sunlight per day due to my particular situation and the battery just could not absorb sunlight fast enough.
For the last 5-7 years, the go-to battery chemistry for solar is LiFePO4 or lithium iron phosphate as a replacement for lead-acid batteries. This battery chemistry is not as energy-dense as Lithium-ion, but the upside is price and safety. In particular, LiFePO4 cells aren't as volatile as Lithium-ion cells. They may start outgassing, but they don't start a fire.
More importantly for my situation: LiFePO4 batteries can charge and discharge at much higer rates than lead-acid batteries2. It's possible to charge LiFePO4 cells with a C-rate of 1! This means that if a battery is rated for 100Ah (Ampere-hours) you can charge with a current of 100 Ampere! My solar setup will never come even close to that number, but at least it's good to have some headroom.
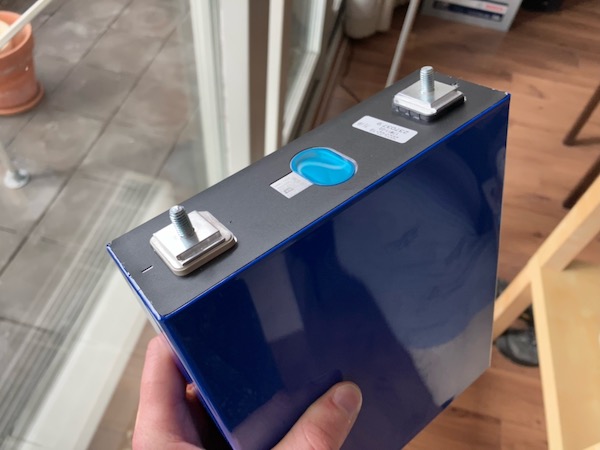 A single 3.2 volt 230Ah Lithium Iron Phosphate prismatic cell
I did contemplate buying an off-the-shelf battery but I decided against it. You have no control over the brand and quality of the LiFePO4 cells they use and more importantly, what's the fun in that anyway?
So I decided to order my own cells and build my own 12 Volt LiFePO4 battery consisting of four cells in series (4S) as my existing system is also based on 12 Volt. Other common configurations are 8S (24 Volt) and 16S (48 Volt3).
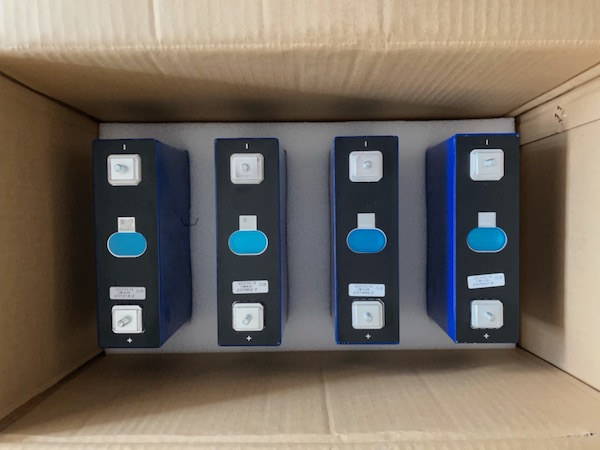
It turned out that I could just buy my cells locally in The Netherlands (instead of China) because of a company that specializes in batteries (no affiliate). As the price was right, I bought effectively 3 KWh for just shy of 500 Euros.
I decided to buy B-grade cells as those are cheaper than A(utomotive)-grade cells. I might have gone for A-grade cells as not to risk anything if I would build a more serious battery bank for my whole home. Yet a lot of people report no significant differences between A-grade and B-grade LiFePO4 cells for solar battery banks so in the end, it's all about your particular apetite for risk.
Just buying cells and putting them in series (in my case 4S) is not enough, a BMS or battery management system is needed, which you put in series with the battery on the negative terminal. I ordered a 100A Daly BMS from China which works fine. I'm even able to use Python to talk with the Daly BMS over bluetooth to extract data (voltages, current, State of Charge and so on).
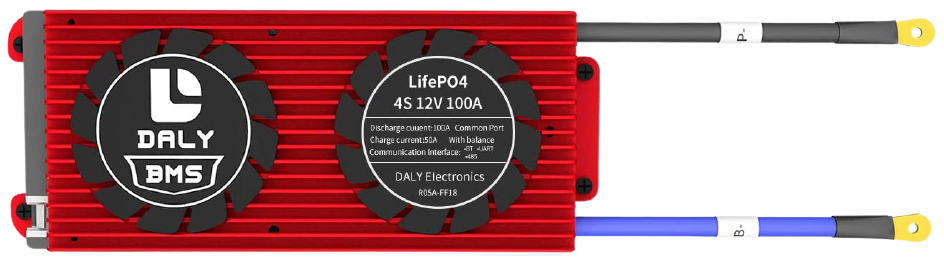
The BMS is critical because it protects the cells against deep discharge and overcharging. In addition, the BMS tries to keep the voltage of the cells as equal as possible, which is called 'balancing'. Charging stops entirely when just one of the cells reach their maximum voltage. If other cells have a much lower voltage, it means that they can still be charged but the one cell with the high voltage is blocking them from doing so. That's why cell balancing is critical if you want to use as much of the capacity as possible.
The Daly BMS is quite bad at cell balancing so I've ordered a separate cell balancer for $18 to improve cell balancing (yet to be installed).
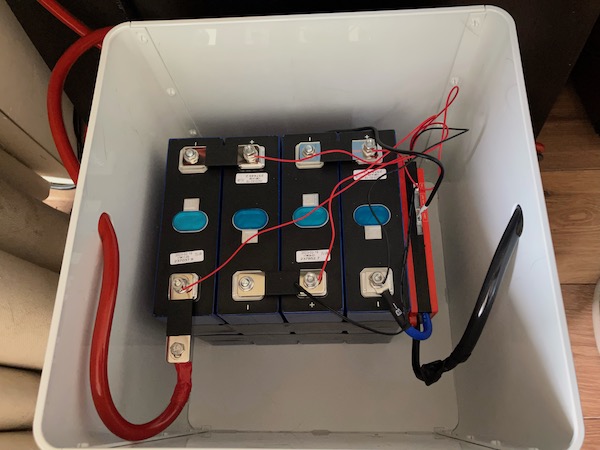

Ikea sells a Kuggis 32cmx32cmx32cm storage box that seems to be perfect for my small battery. As it has two holes on the sides, I just routed the positive and negative cables through them.
Now that I've put this battery in place I've seen a huge improvement regarding solar charge performance.
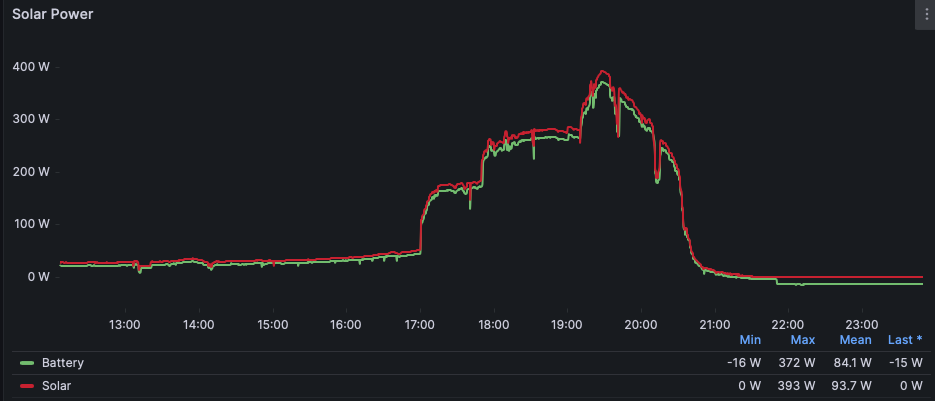
I've actually potentially created a new problem: my solar charge controller can only handle about 400 Watts of solar power at 12V and my setup is quite close to reaching this output. I may have undersized my solar charge controller and it has come back to bite me. For now, I'm going to just observe: if that peak of 400 Watts is only reached for a brief time - as it is right now - I don't think I'm going to upgrade my solar charge controller as that would not be worth it.
As we are still in May, my best yield is 1.2 KWh per day. Although that's paltry as compared to regular residential solar setups, that 1.2 KWh is more than a third of my battery capacity and can run my computer setup for 10 hours, so for me it's good enough.
It's funny to me that all of this started out with just a 60 Watt solar panel, a 20 Euro solar charge controller (non MPPT) and a few 12V 7Ah lead acid gel batteries in parallel.
I think it's beyond amazing that you can now build a 15KWh battery bank complete with BMS for less than €3000. For that amount of money, you can't come even close to this kind of capacity.
For context, it's also good to know that the longevity of LiFePO4 cells is amazing. A-grade cells are rated for 6000 cycles ( 16+ years at one cycle per day ) and my vendor rated B-grade cells at 4000 cycles (~11 years).
Maybe my battery build may inspire you to explore building your own battery. LiFePO4 cells come in a whole range of capacities, I've seen small 22Ah cells or huge 304Ah cells so you can select something that fits your need and budget.
If you're looking for more information: there are quite a few Youtubers that specialise in building large battery banks (48 Volt, 300Ah, ~15KWh) to power their homes and garages.
Although Will Prowse reviewed LiFePO4 cells in the past, he currently focusses mostly on off-the-shelf products, like "rack-mount" batteries and inverter/chargers.
I also like the off-grid-garage channel a lot, the channel as tested and explored quite a few products.
Harrold Halewijn (Dutch) also has quite a few videos about solar setups in general and solar battery setups. He's really into automation, in combination with flexible (next-day) energy prices.
Also in Dutch, a cool article about some people building their own large-scale home storage batteries (15KWh+)
Another Dutch person build a solar power factory with a battery capacity of 128 KWh for professional energy production. Truely amazing.
The Hacker News thread about this article.
-
https://news.ycombinator.com/item?id=35596959#35597492 ↩
-
To fully charge a lead-acid battery, the charging process spends a lot of time in the contstant-voltage phase, the voltage is kept constant so as the battery charges further, the charging current goes down, so the charge process slows down. More info can be found here ↩
-
It seems to me that most batteries build for home energy storage systems are standardising on 48 volt. ↩
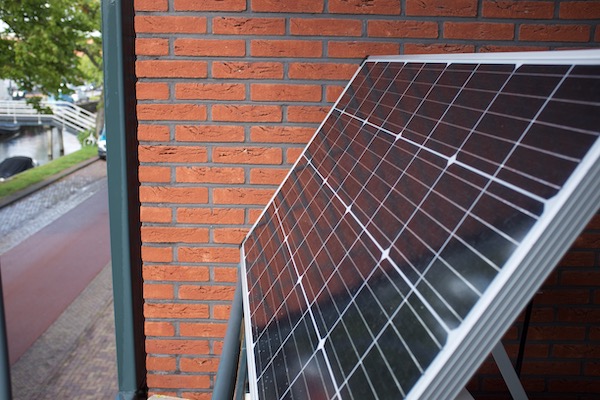 original solar panel
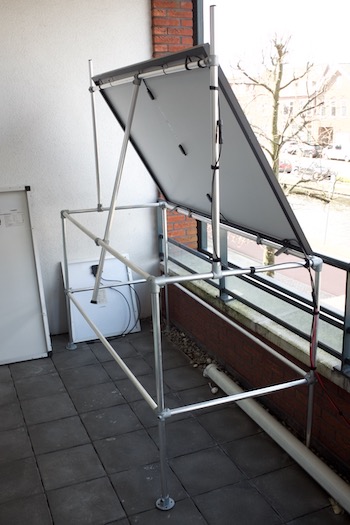
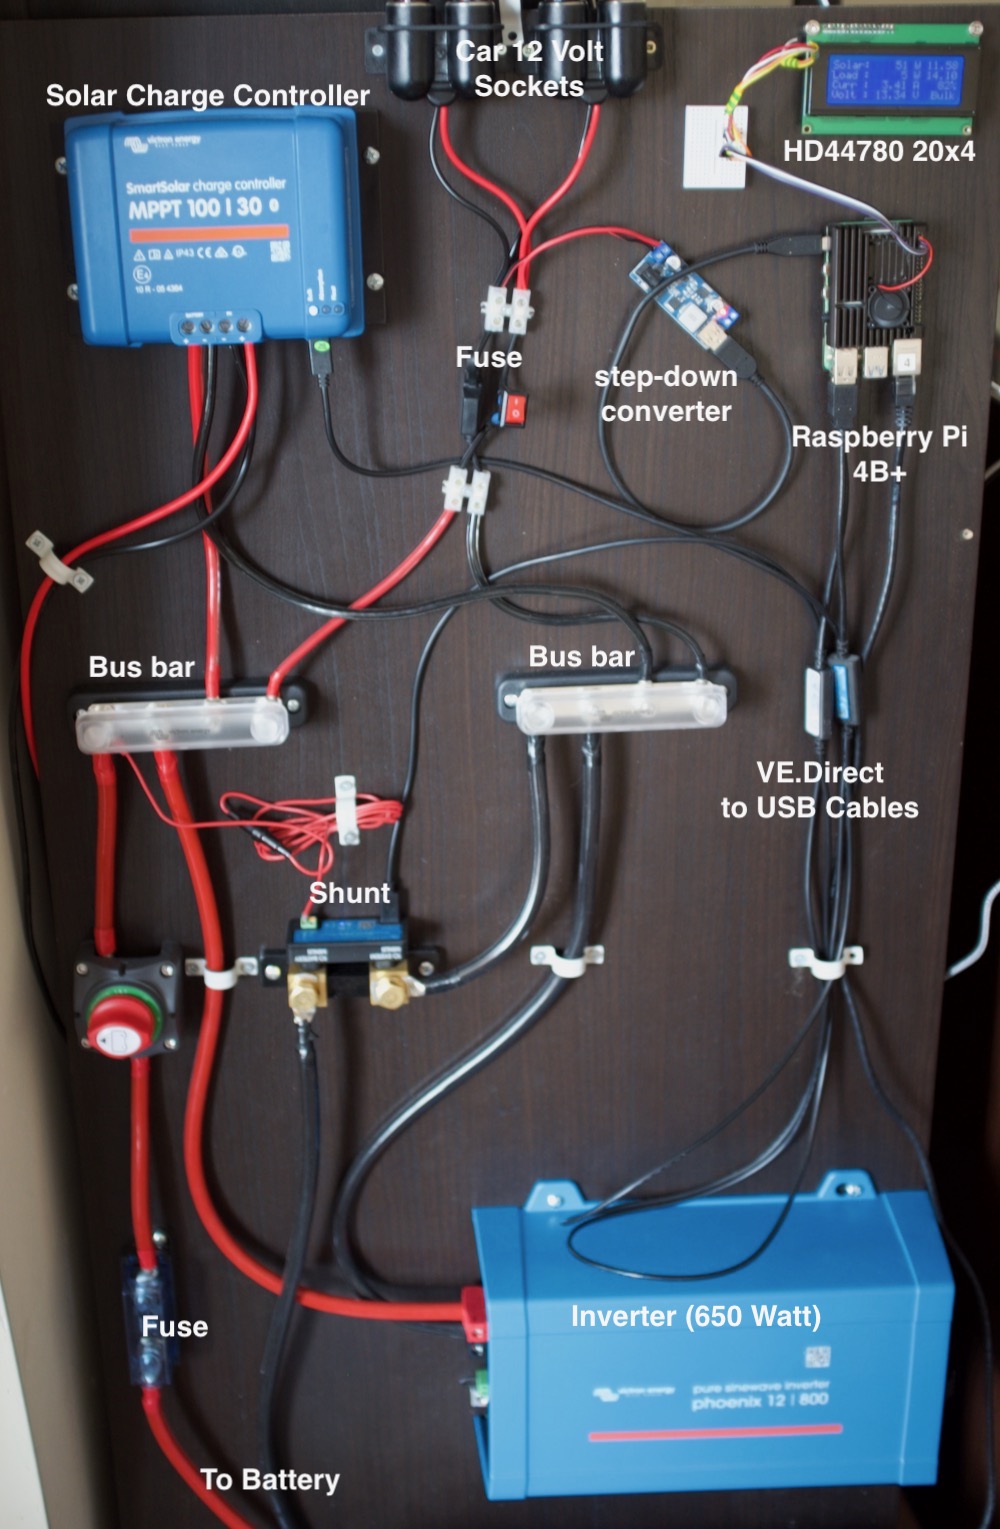 the latest iteration of my solar setup
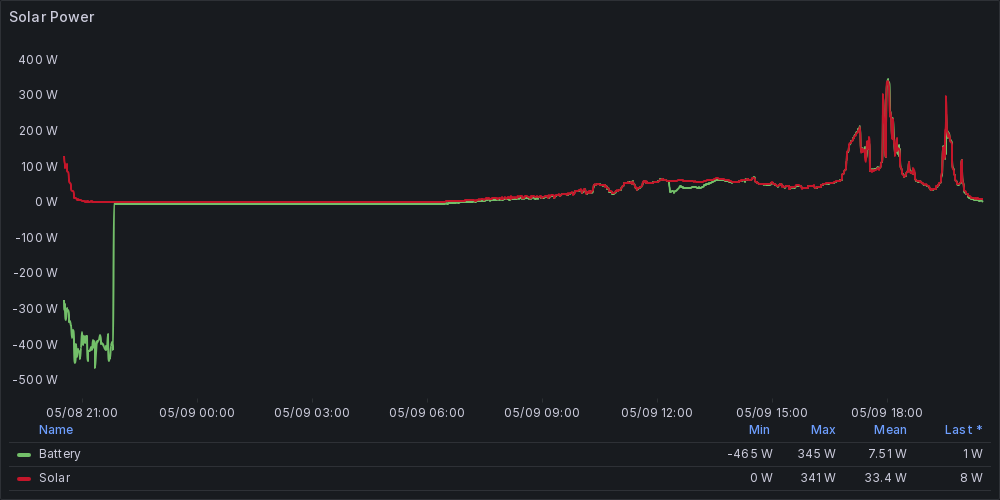
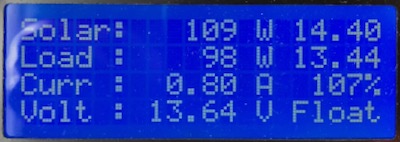
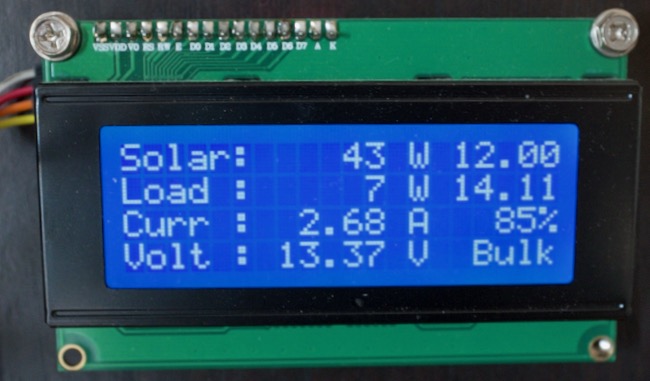 the 20x4 LCD screen
