Articles in the Storage category

  1. Speeding Up Linux MDADM RAID Array Rebuild Time Using Bitmaps

    Thu 22 December 2011

    Update 2020: Please beware of the impact of random write I/O performance.

    Please note that with a modern Linux distribution, bitmaps are enabled by default. They will not help speed up a rebuild after a failed drive. But it will help resync an array that got out-of-sync due to power failure or another intermittent cause.


    When a disk fails or gets kicked out of your RAID array, it often takes a lot of time to recover the array. It takes 5 hours for my own array of 20 disks to recover a single drive.

    Wouldn't it be nice if that time can be reduced? Even to 5 seconds?

    Although not enabled by default, you can enable so called 'bitmaps'. As I understand it, a bitmap is basically a map of your RAID array and it charts which areas need to be resynced if a drive fails.

    This is great, because I have the issues that of every 30 reboots, sometimes a disk won't get recognized and the array is degraded. Adding the disk back into the array will mean that the system will be recovering for 5+ hours.

    I enabled Bitmaps and after adding a missing disk back into the array, the array was recovered instantly.

    Isn't that cool?

    So there are two types of bitmapsL

    1. internal: part of the array itself
    2. external: a file residing on an external drive outside the array

    The internal bitmap is integrated in the array itself. Keeping the bitmap up to date will probably affect performance of the array. However I didn't notice any performance degradation.

    The external bitmap is a file that must reside on a EXT2 or EXT3 based file system that is not on top of the RAID array. So this means that you need an extra drive for this or need to use your boot drive for this. I can imagine that this solution will have less impact on the performance of the array but it is a bit more hassle to maintain.

    I enabled an internal bitmap on my RAID arrays like this:

    mdadm --grow /dev/md5 --bitmap=internal
    

    This is all there is to it. You can configure an external bitmap like this:

    mdadm --grow /dev/md5 --bitmap=/some/directory/somefilename
    

    There probably will be some performance penalty involved, but it does not seem to affect sequential throughput, which is the only thing that is important for my particular case.

    For most people, I would recommend configuring an internal bitmap, unless you really know why you would have to use an external bitmap.
    If you have any comments email me, see the About page for contact details.
  2. Cheap Solution for Putting an SSD in an iMac

    Mon 11 July 2011

    If you want to order a new iMac with an SSD there are two problems:

    1. An SSD of 256 gigabytes will cost you a lot: 600 euros.
    2. The SSD is of medium quality, and does not justify the cost of 600 euros.

    Here you can find information about the Toshiba SSD that Apple provides.

    You can consider buying an SSD for half the price and put it inside your new iMac yourself afterwards. However, this is a hassle and you will probably void your waranty.

    The solution is to buy an SSD yourself and put it in an external Firewire 800 casing. Firewire 800 provides you with about 70 megabytes per second of troughput, which is enough for most applications. It is about three times faster than USB and the latency of Firewire is lower than that of USB, thus improving responsiveness.

    Thunderbolt would provide the best solution, but as of July 2011, there are no Thunderbolt products on the market.

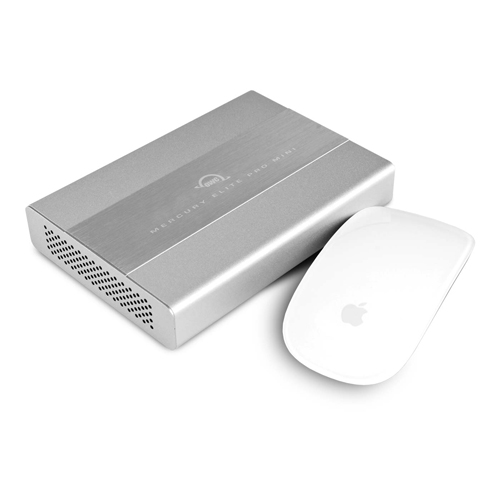
    The product I use is an external 2,5 inch Firewire 800 casing of OWC: the Mercury Elite-AL Pro mini. This casing cost me about 60 euros or 80 dollars including shipping costs. I admit that this solution is not cheap, but it does work. And you won't void your warranty and it is way cheaper than the Apple SSD.

    OWC casing

    OWC connectors

    I've put my Intel SSD inside this casing and my mac boots in about 15 seconds. After entering username and password, login is almost instantaneously.

    Caveat

    I encountered one problem with the OWC casing. I encountered random system freezes, related to the external OWC housing. Using the internal 1 TB hard drive, I had no problems. The cause of this issue is probably related to power not being provided to the OCW casing after the systems returns from sleep.

    I resolved this issue by connecting a special USB cable to the iMac and connecting the other end to the 5V DC Power Input on the OWC casing. After that, the daily random system freezes vanished. These cables can be obtained almost everywhere.

    If you have any comments email me, see the About page for contact details.

Page 18 / 24