Update fall 2024 I have decided to decomission this machine and it is no longer in use.
As of this moment, it's replaced by a cluster of four 1L PCs which use about a third of the idle power usage and boot within 20 seconds. The single-core performance of these low-power 1L PCs surpasses the performance of this older machine.
If I even decide to build a new lab server with a lot of cores and memory in a single machine, I'll build a regular system and won't use datacenter hardware anymore due to the noise and slow boot process.
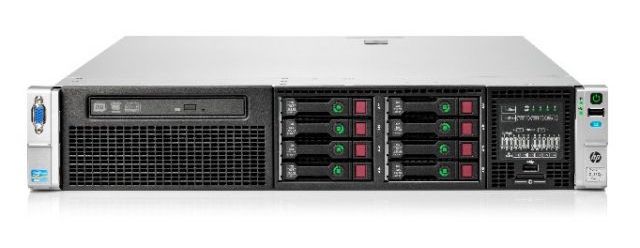
I've bought a secondhand HP DL380p Gen8 server and I think it's awesome.
This machine has dual-processors, with each CPU having 10 physical cores and two threads per core, for a grand total of 20 cores / 40 threads for the entire machine. It's also equiped with 128 GB or memory.
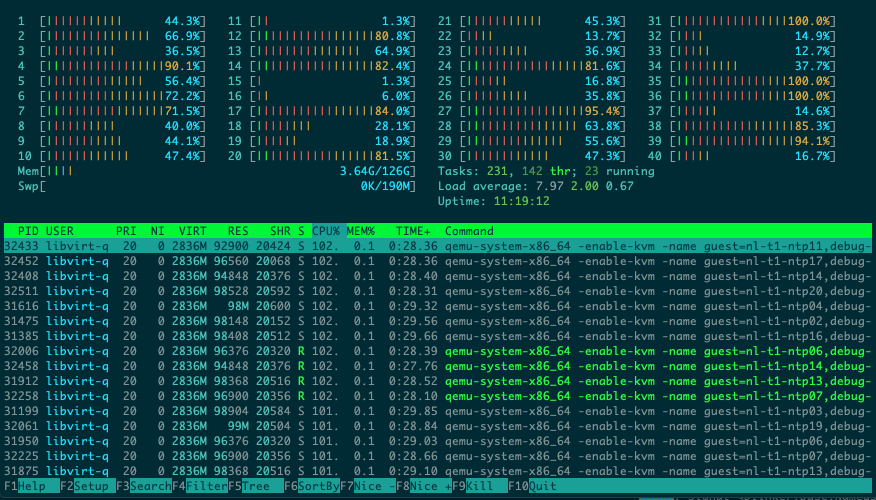
Laughs in htop
I bought this machine because I wanted to have a dedicated server on which I run my home lab environment. This is the box on which I will try out new software, run experiments, test ideas and so on.
In this article I'd like to share some information about this machine and my experiences with it. Let's start with an overview of the specifications.
Update: this article featured on Hacker News, click here for the discussion thread.
HP DL380p Gen8 Specifications
| Part | Description |
|---|---|
| Form factor | 19" 2U rackmount |
| Processor | 2 x Intel(R) Xeon(R) CPU E5-2680 v2 @ 2.80GHz |
| RAM | 128 GB DDR3 (16 x 8GB) |
| Onboard LAN | 4 x Broadcom 1 Gigabit (Copper) |
| RAID Controller | HP P420i |
| Storage | 8 x 2.5" SAS/SATA slots (no media) |
| PSU | 1 x 750 Watt |
| Power usage | about 110 Watt idle |
| KVM | HP iLO 4 with HTML5 console |
Cost
I've bought this server for around 1500 Euro ($1700) including taxes (21%) and a one year warranty. I've bought it from the company https://creoserver.com (The Netherlands).
Update 2021: This kind / generation of hardware seems to be dumped on the market for less than half of what I paid for it at the time.
I believe that the price/performance balance for this server is quite good, but I let you be the judge of that.
The storage is based on some SSDs I already owned and some new SSDs I've bought separately. So the price is based on the chassis + storage caddies but without actual storage media.
Age
The HP DL380p Gen8 product generation was introduced in 2012. The configuration I have chosen is based on a CPU that was introduced in 2013. Based on the serial number I guess the chassis+motherboard is from 2014 (about 5 years old1 at the time I bought it).
CPU - The Intel Xeon E5-2680 v2
The Intel Xeon E5-2680 v2 CPU originated from late 2013 and is based on the ivy bridge architecture. The base clock is 2.8 Ghz but it can turbo boost up to 3.6 Ghz. With 10C/20T per CPU and the dual-processor configuration it's needless to say that you can run quite a few virtual machines and/or containers in parallel on this machine, without even oversubscribing CPU cores.
You may ask what kind of performance you may expect from this box and how 2013 holds up in 2019. A high number of cores is nice, but the cores themselves fast enough?
The 2680v2 is a processor that sold for about $1700 (Intel Ark) when it came out in 2013. If you look at the list of Xeon processors from that timeframe, it was the top of the line Intel dual-processor compatible CPU with only the E5-2690 v2 processor above it, which ran only 200 Mhz faster (base clock).
There was almost nothing better at that time and people ran their companies on those machines so I think performance is more than enough. Especially for a lab environment (overkill is probably an understatement).
I've included some benchmark results below just for reference. You can use this information to make some comparisons to other CPUs that you are familiar with to get some sense of the performance.
I've also compared scores a little bit and I've noticed that people in the past were perfectly happy gaming on desktop systems with CPUs that have equal or less single core performance.
Geekbench 4 score
I've run Geekbench on the DL380p Gen8:
Single Core:  3525
Multi Core : 48764
Passmark
(source)
Single Core:  1788
Multi Core : 12612
Sysbench
root@dora:/home/ansible# sysbench --test=cpu --cpu-max-prime=20000 run
[.....]
General statistics:
    total time:                          10.0002s
    total number of events:              4358
[.....]
Some perspective: My intel Mac mini 2018 and my game pc from 2013 also hit 10 seconds runtime. For whoever thinks they should work with 'cheap' Raspberry Pi's, this is the sysbench score of a Raspberry Pi 3B+.
Test execution summary:
    total time:                          328.3016s
It's 32x slower. I really recommend to not use Pi's except for electronic projects. The performance is so bad, it's not worth it. Even a small VM on your desktop/laptop is already way faster.
Other benchmarks
I won't promise anything, but if it's not too much work I can run a benchmark if you have any suggestions. Feel free to comment down below or email me.
Memory
I've ordered this machine with 128GB of DDR3 memory. The memory consists of 16 x 8GB 1333Mhz memory modules. The machine has 12 memory slots per CPU so there are still 8 slots left to be filled if I ever feel a need to expand memory.
Storage
Drive slots
I've chosen a chassis with room for 8 x 2.5" drives. Depending on the chassis model, you can go up to 25 x 2.5" (Small Form Factor) or 12 x 3.5" (Large Form Factor).
Both SAS and SATA HDDs/SSDs are supported. You can't just stick HDDs or SSDs in the drive slots, you need to put your HDD/SSD first in an empty caddy, I bought those with the server.
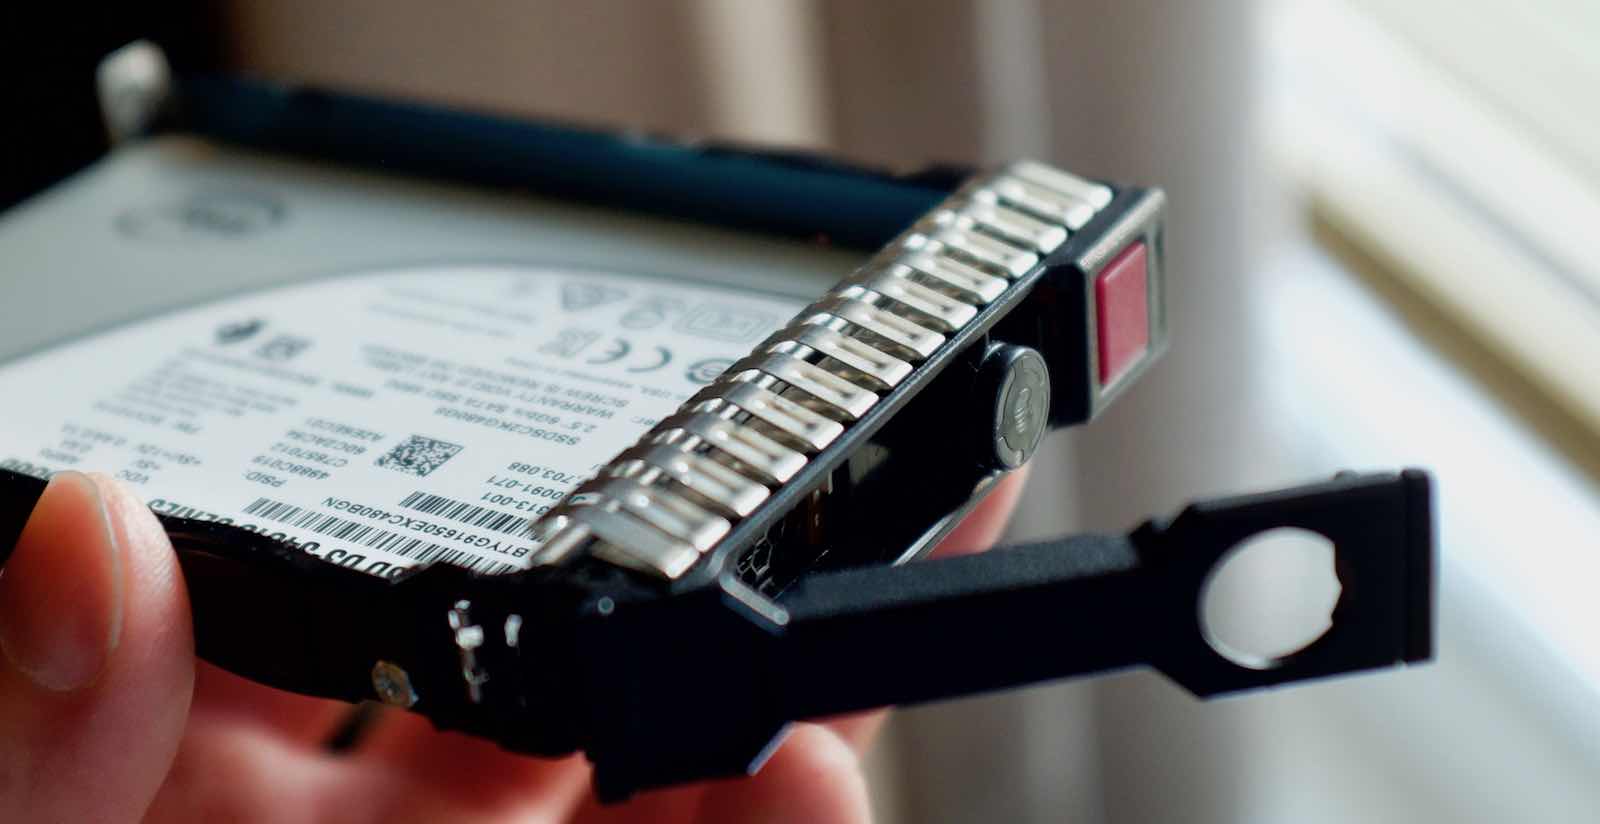
The caddy has the LED lights build-in to signal the drive status. It has some electrical contacts at the back for those lights, it's not just a plastic 'sabot'.
My caddies tended to be a bit fragile, they came apart when trying to pull a drive out of the cage, but nothing broke and it all works fine.
Drive compatibility
HP servers can be picky about which HDD disk drives work or won't work. They all technically work, but sometimes the disk temperature cannot be read by the controller. In that case, the system fans will slowly start to spin faster and faster until almost maximum speed. This is obviously not workable.
Smaller HDD drives did work fine and the server stayed quiet. Only some 500GB HDD drives caused 'thermal runaway'.
I've found this table of supported and unsupported drives for HP controllers.
Overview of SSDs that are compatible
I've tested these SSDs:
- Samsung 860 Pro (consumer)
- Samsung PM833   (enterprise)
- Intel D3-S4610  (enterprise)
- Crucial MX200   (consumer)
P420i RAID mode vs. HBA mode
Important: you can't boot from the storage controller in HBA mode. You are left with booting from internal/external USB (2.0) or internal SD card.
I'm not sure if there is any significant performance difference between the two modes for SSDs. I just want to be able to boot from one of the drives, not from USB/SD card.
Storage management - ssacli tool
To configure the P420i RAID controller, It's highly recommended to install the ssacli tool from HP. Otherwise you have to reboot and wait 10 minutes (no joke) to enter the 'Smart Array Configuration Utility' to make changes to the storage configuration.
I just followed these instructions to install this tool on Ubuntu:
curl http://downloads.linux.hpe.com/SDR/hpPublicKey1024.pub | apt-key add -
curl http://downloads.linux.hpe.com/SDR/hpPublicKey2048.pub | apt-key add -
curl http://downloads.linux.hpe.com/SDR/hpPublicKey2048_key1.pub | apt-key add -
curl http://downloads.linux.hpe.com/SDR/hpePublicKey2048_key1.pub | apt-key add -
Contents of /etc/apt/sources.list.d/hp.list:
deb http://downloads.linux.hpe.com/SDR/repo/mcp/Ubuntu bionic/current non-free
For Debian:
deb http://downloads.linux.hpe.com/SDR/repo/mcp/debian bookworm/current non-free
Installing the software:
apt-get update
apt-get install ssacli
Some examples:
ssacli ctrl all show detail
ssacli ctrl slot=0 array all show detail
ssacli ctrl slot=0 ld all show detail
ssacli ctrl slot=0 pd all show detail
ssacli ctrl slot=0 ld 7 delete
ssacli ctrl slot=0 create type=ld raid=0 drives=2I:2:7 ss=8 ssdopo=off
ssacli ctrl slot=0 array i modify ssdsmartpath=disable
ssacli ctrl slot=0 pd 1 modify led=on
RAID vs non-RAID
You are forced by the RAID controller to always create a RAID array, even if you don't need the redundancy or performance.
I've chosen to just put SSDs in individual RAID0 logical drives, making them effectively individual drives from the perspective of the operating system. I'm not running a mission-critical application so this is fine for me.
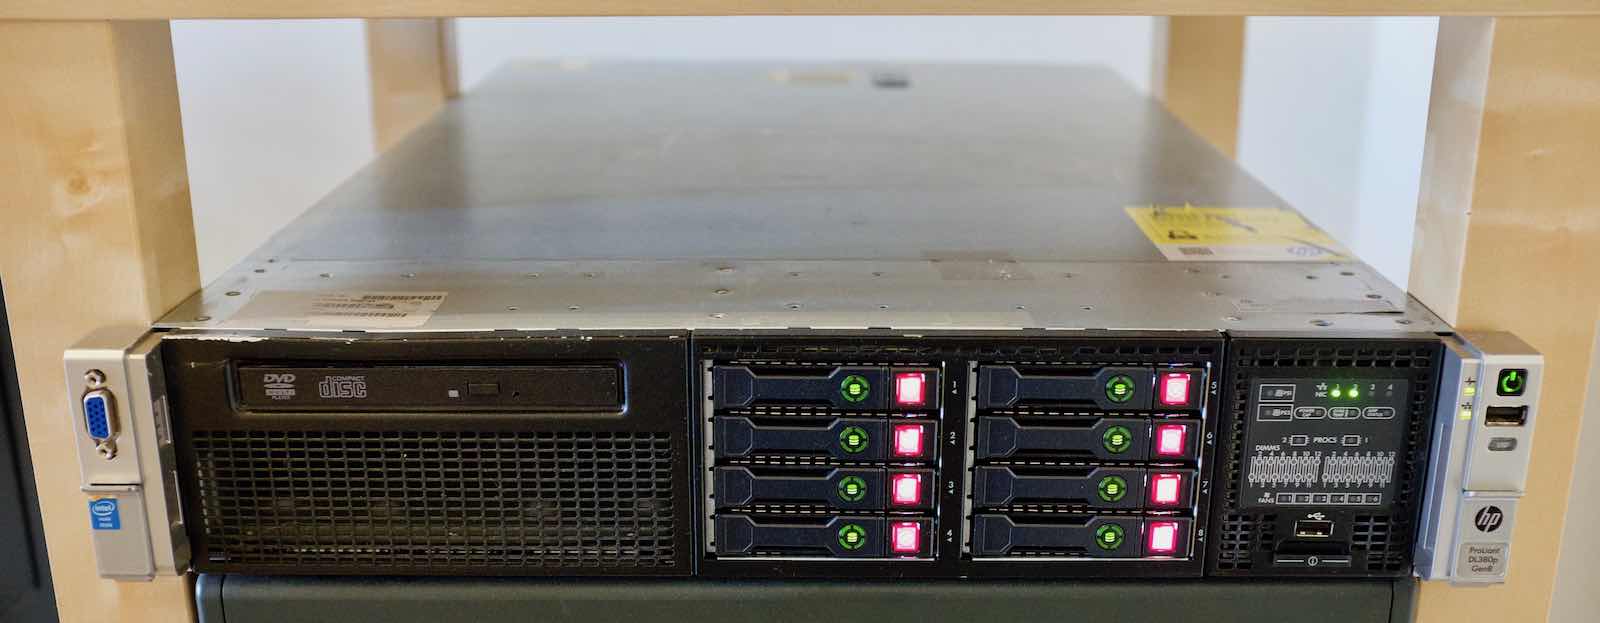
A small downside is that the bright red square light on each drive will permanently glow up. That light signals truthfully that you cannot remove a drive without killing the 'array'. I've not seen any option to turn this off, which I can understand.
Sound / Noise level
Idle sound level
I've taken some sound measurements using my iPhone with an app, so how reliable this is, I don't know but it's something.
During boot time (full fan speed)  : 62 dB
Idle, booted into operating system : 50 dB
To set some expectations:
My very subjective opinion is that at 50 dB the sound level is reasonable for a server like this, but it's definitely not quiet. I would not be able to work, relax or sleep with this server in the same room.
Although this server is fairly quiet at idle, it does need its own dedicated room. When the door is closed, you won't hear it at idle, but under sustained load, you will hear high pitched fan noise even with a closed door.
Impact of adding a PCIe card on noise level
When you put any kind of PCIe card in the server, two of its six fans in-line with the PCIe expansion slot will run at 40%+ to cool these cards.
The sound level will become a bit annoying. I've not found any option to disable this behavior. This means that if you need to expand the server with additional network ports or other components, the server really needs a room with a closed door.
Please note that if you want to keep noise levels down but want to upgrade to 10Gbit networking, you could opt to configure the server with Flexlom 2 x 10Gbit instead of the stock Flexlom 4 x 1 Gbit copper. This will give you more bandwidth without the need to add a PCIe card.
At this time, I have no need to add any high-speed networking as I can run the simulations all on the machine itself (at least that's the plan).
Idle power usage
The DL380p has several BIOS settings that trade performance for (idle) power consumption. I have tested the performance and idle power usage for two power profiles:
HP Power Profile: Balanced Power and Performance
Present Power Reading: 76 Watts
Geekbench Single Core score: 2836

HP Power Profile: Static High Performance
Present Power Reading:  100 Watts
Geekbench Single Core score: 3525
Please note: that actual power usage includes +10 Watt for the iLO interface, to the system would use 86 Watt or 110 Watt at the wall outlet.
What we can learn from the above test results is that the high performance setting uses 31% more power at idle and in return you get 20% more single core performance.
The server supports (obviously) dual power supplies but that option only adds cost, increases power usage and gains me nothing. I'm not running a mission-critical business with this server.
By default, this server is turned off. When I want to do some work, I turn the server on using wake-on-lan. I do this with all my equipment except for my router/firewall.
Boot up time
I clocked 4 minutes and 28 seconds until I got a ping reply from the operating system.
KVM / iLO (Remote Management)
As with almost all HP servers, this machine has a dedicated remote management port + engine (iLO) so you can do everything remotely, such as powering the server on/off. You also have access to a virtual console (KVM over IP) and virtual CD-ROM drive to remotely provision the server.
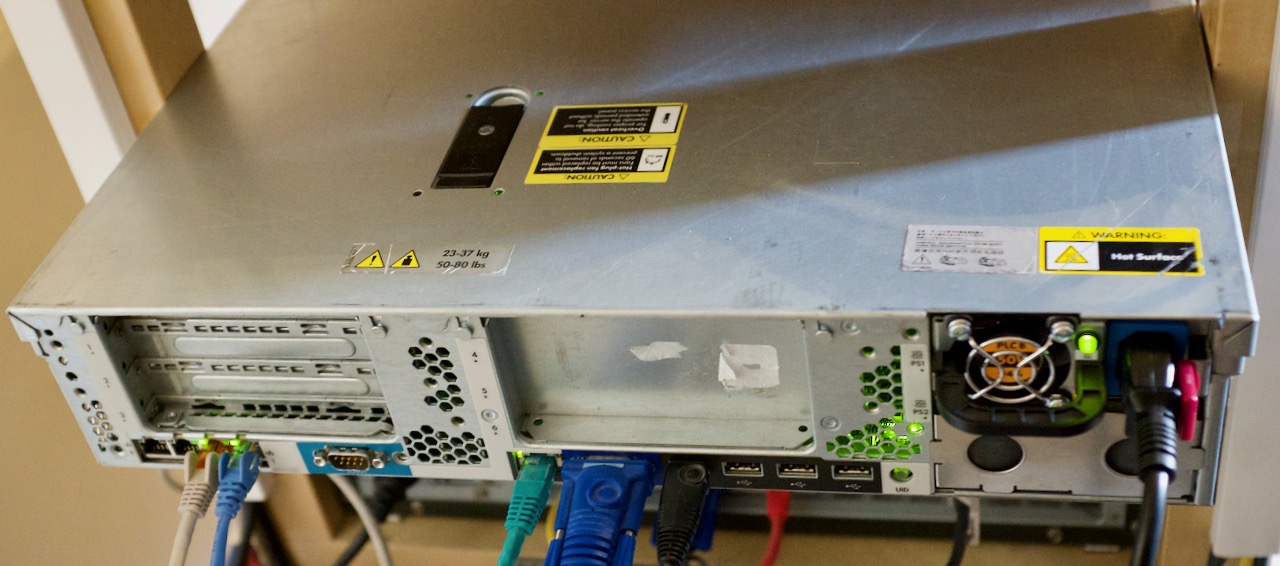
For those of you who are less familiar with this hardware: notice the network interface left of the VGA connector. This is the iLO remote management interface. It's a mini computer with its own operatingsystem and IP-address, thus reachable from the network.
In the past iLO or similar solutions were a pain to use because you need Java or .NET to use the virtual console. With the ilO 2.7 update you will have a HTML5 interace, doing away with the need for both Java as .NET. This is a huge usability improvement.
Operating system
I'm currently running Ubuntu Linux 18.04 and using plain vanilla KVM to spawn virtual machines, wich works fine. Everything is maintained/configured with Ansible.
Closing words
I hope this overview was informative. Maybe it could be an option for yourself to consider if you ever want to setup a home lab yourself.
-
As far as I know this is not 100% reliable as the motherboard serial number can be changed to match the chassis when it's replaced due to failure. I guess it will have to do. ↩
