During a cleaning spree I decided that it was time to recycle two old laptops that were just collecting dust on a shelf for many years. Although I didn't have any purpose for them anymore, I realised that the displays were still perfectly fine.
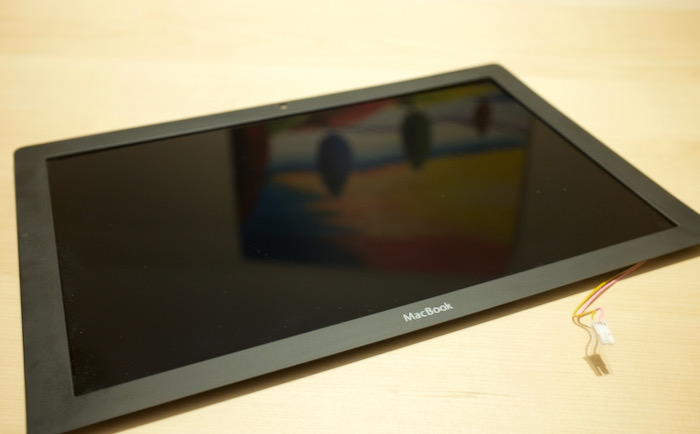
This is the display of my old 13" Intel-based MacBook.
Somehow it felt wasteful to just throw the laptops out, I wondered if it would be possible to use these displays as a regular monitor?
It turns out: yes this is possible and it is also quite simple. My blogpost covers the same topic, with a few more pictures1.
There is a particular LCD driver board that can be found all over ebay and the well-known Chinese webshops.
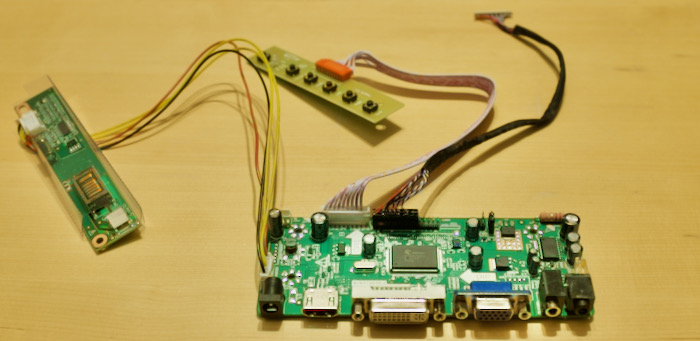
These boards cost around $20 and come with most things you need to get the display operational.
The board includes:
- A small controller print for the on-screen display (center)
- A high-voltage power supply for the backlight (left)
- The data cable to drive the actual display (right)
- Support for audio-passthrough + volume control (right corner)
The board doesn't include:
- A 12-volt power supply
- Some kind of frame to make the display and board one easy to handle unit
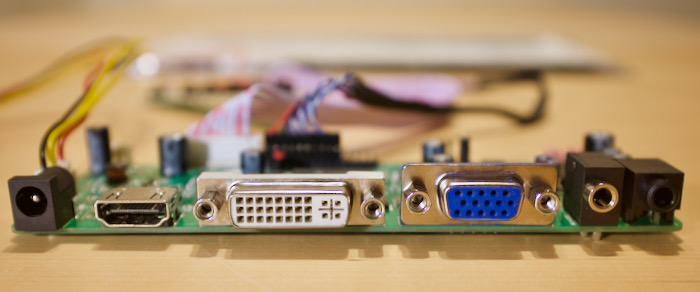
The board supports HDMI, VGA and DVI for signal input so it should work with almost any computer.
This particular board (M.NT68676.2) is used to power many different panel models. Although the board itself may be the same, it's important to order the board that is specifically tailored to the particular LCD panel you have. The panels seem easy to identify. This is the Macbook LCD panel type (LP133WX1 TL A1):
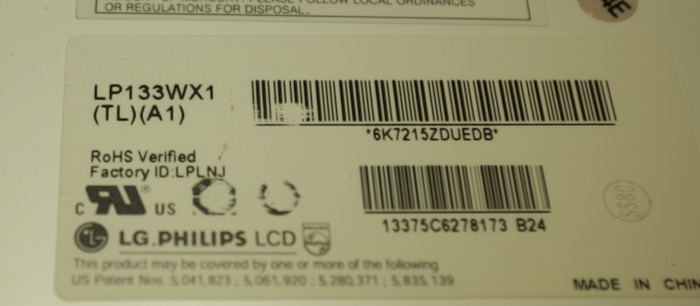
That TL/A1 part of the model is critical to finding the appropriate controller.
I also have an old Dell Vostro screen that uses the exact same driver board, but the cables are different. Also, it may be the case that the boards are flashed with the appropriate firmware for the particular panel. So I would recommend not to gamble and get the driver board that exactly matches the model number.
To make everything work, we first connect the high-voltage module to the backlight power cable...
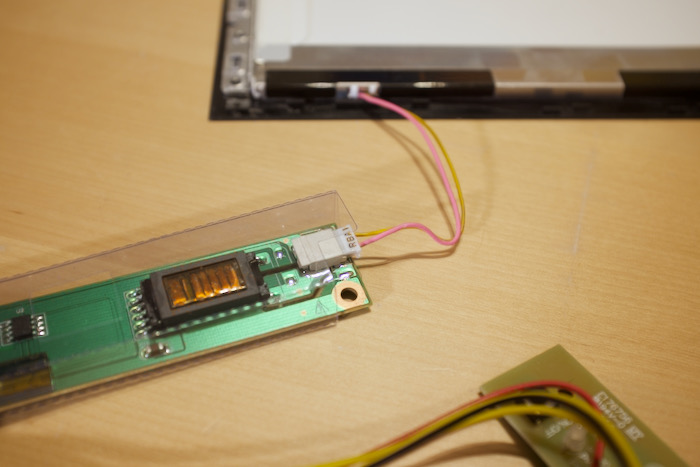
...and we also connect the LCD driver cable:

When I connected everything for the first time, the display didn't work at all. It turns out that the board shipped with a second, separate interface cable and I had to swap those cables to make the display work properly.
Power supply
According to the sales page, the board requires a 12-volt 2A adapter, but in practice, I could get away with a tiny, much weaker power supply.
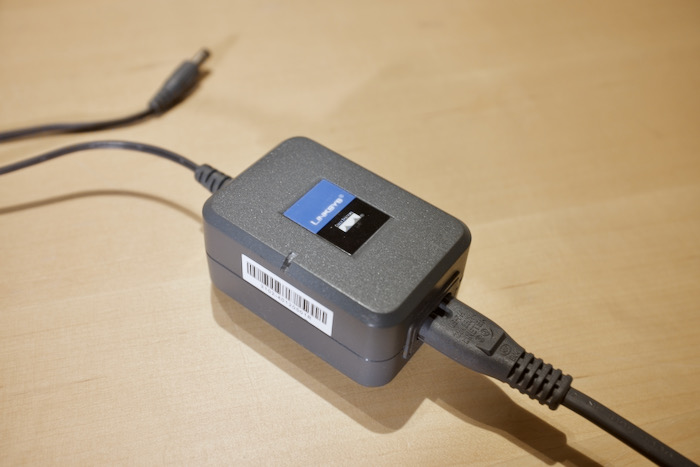
I found an old adapter from a Wi-Fi access-point (long gone) which is rated for just 0.5A. It did power both the board and the screen perfectly. It worked with both the Macbook display as the Dell display so it doesn't seem to be a fluke.
Although I didn't measure actual power consumption, we know that it can't be more than just 6 Watt because that's what the power adapter can handle.
Laptop displays need to be power efficient and that may also make them interesting for low-power or battery-powered projects.
We've only just begun
The display works, but that was the easy part.
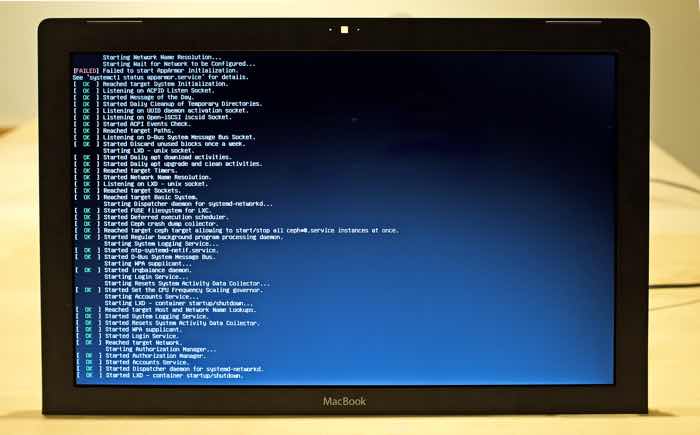
The hardest part of this proces (not pictured) was switching the on-screen-display from Chinese (which I don't master) to English. But there is more work ahead.
At this point we end up with just a fragile LCD panel connected to a driver board through a bunch of wires. The whole setup is just an unpractical mess. There are at least two things left to do:
- Mount the driver board, OSD controller and high-voltage unit to the back of the LCD panel
- Make some kind of stand
For the old Dell display, I used a bit of wood and hot glue to make a wooden scaffold on which I could mount the driver board with a few screws. It won't win any prizes for sure but it's just an example of what needs to be done make the display (more) manageable.
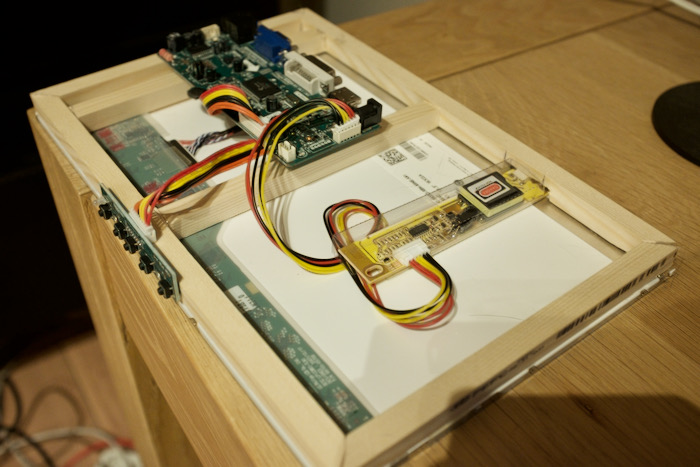
It still doesn't have a stand but that's for another day. I can imagine that if you own a 3D printer, you can make a nice case with a stand, although that will increase the cost of the project.
Evaluation
What I like most about this kind of project is the fact that for very little money, you can recycle a perfectly fine and usable display that will probably last for another five to ten years. The project takes very little effort and it is also not difficult to do.
You can augment existing hobby projects with a screen and due to the relatively low power consumption, it may even be suitable for battery-powered projects.
And with a bit of work you can make a nice (secondary) monitor out of them. Finally you have an excuse to dust off one of your unused Raspberry Pis that you had to have but didn't have any actual use for.
The thrift-store is cheaper
If your goal is just to get a cheap LCD display, it may be cheaper to go to the nearest thrift-store and buy some old second-hand display for $10. But that may have some drawbacks:
- It will be much larger than the laptop screen
- It is powered by 110/220 volt so less suitable for a battery-powered setup
- overall power consumption will be higher
So it all depends on your particular needs.
Closing words
If you also repurposed a laptop monitor for a project or just as a (secondary) screen, feel free to share your work in the comments.
-
I posted the article on slashdigit to hacker news and it got quite an interest. ↩

Comments