1. Setting Up a VPN With Your iPhone Using L2TP, IPSec and Linux

    Sun 11 December 2011

    This blogpost discusses how to setup an IPSec-based VPN between your iPhone and a Linux server.

    Updated 16 October 2012 - now compatible with Ubuntu 12.04 LTS

    IMPORTANT! (update January 2013)

    I find using OpenVPN with the new iOS OpenVPN client a way better solution. OpenVPN actually restores VPN connectivity when returning from sleep.

    Why using a VPN with your iPhone?

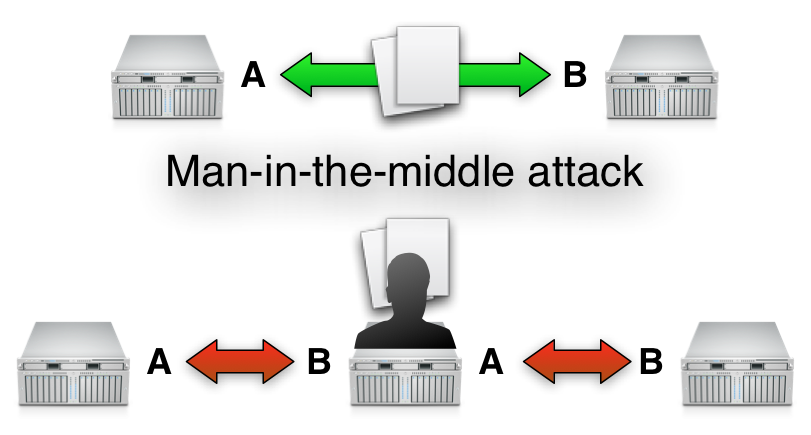
    1. Security: all data is encrypted and cannot be read by malicious people trying to eavesdrop on your data.
    2. Performance: my subjective experience is that a VPN can speed up web browsing, it seems to reduce latency.

    Introduction

    I am assuming that you use:

    • an iPhone as the VPN client
    • a Debian-based Linux distro, such as Debian or Ubuntu (used here)

    We will use the following software:

    • openswan
    • xl2tpd
    • pppd

    To setup the VPN, we need to configure the following steps:

    1. install the software
    2. configure IPSec
    3. configure L2TP
    4. configure PPP
    5. open up the appropriate firewall Ports
    6. setup firewall rules to forward traffic between the iPhone and Internet
    7. configuring the iPhone

    This set of instructions is 90% based on instructions on peen.net made by Niels Peen (Groeten!). I borrowed some other stuff from this blog.

    I use openswan for IPSec support because strongswan does not support NAT by default. I just want to use software as part of the operating system and don't like to have to maintain manually compiled versions. This is why.

    Initial assumptions

    • You are using a Linux host as the VPN server
    • The server is accessible from the internet or the appropriate UDP ports are forwarded to the box.
    • You have full control over the box and it's firewall configuration.
    • Your iPhone has an unfiltered internet connection. If UDP is blocked, this type of VPN is not for you.

    Install the software

    First, we start with installing all required software:

    apt-get install openswan xl2tpd ppp
    

    Configure IPSec

    Now we start with configuring the software. First we start with IPSec:

    /etc/ipsec.conf
    
    config setup
        nat_traversal=yes
        protostack=netkey
        plutostderrlog=/tmp/log.txt (for debugging)
    
    conn L2TP-PSK
        authby=secret
        pfs=no
        rekey=no
        type=tunnel
        esp=aes128-sha1
        ike=aes128-sha-modp1024
        ikelifetime=8h
        keylife=1h
        left=<INTERNET IP ADDRESS OF ROUTER / SERVER>
        leftnexthop=%defaultroute
        leftprotoport=17/1701
        right=%any
        rightprotoport=17/%any
        rightsubnetwithin=0.0.0.0/0
        auto=add
        dpddelay=30
        dpdtimeout=120
        dpdaction=clear
    

    Some notes about this configuration:

    • We use a secret or password for authentication. Sources on the internet seem to suggest that the iPhone cannot handle certificates.
    • we must configure the dead peer detection rules at the bottom or else you cannot reconnect to the VPN when returning from sleep.

    We thus also need to configure an encryption secret (password) for the IPSec tunnel.

    /etc/ipsec.secrets
    
    %any %any: PSK "thisismysupersecretpassword"
    

    It is smart to choose a strong (long) password.

    Configure L2TP

    Inside the directory /etc/xl2tpd you have to edit xl2tpd.conf like this:

    [global]
    auth file = /etc/l2tpd/l2tp-secrets
    debug network = yes
    debug tunnel = yes
    
    [lns default]
    
    ip range = 10.0.1.201-10.0.1.240
    local ip = 10.0.1.200
    require chap = yes
    refuse pap = yes
    require authentication = yes
    name = <ENTER SOME NAME HERE>
    ppp debug = yes
    pppoptfile = /etc/ppp/options.xl2tpd
    length bit = yes
    

    The "ip range" is within your internal network. It is a range outside of your DHCP-scope. The "ip range" must not include the "local ip". This IP address is dedicated to your Linux host.

    Important: once the VPN setup is working properly Turn off all debugging options (set them to 'no'). Otherwise, your logs will fill up very quickly because every time a packet is transmitted, this is logged.

    Configure PPP

    Now we must configure PPP. Edit /etc/ppp/options.xl2tpd and make it look like this:

    ipcp-accept-local
    ipcp-accept-remote
    ms-dns <ADDRESS OF LOCAL OR REMOTE DNS SERVER>
    noccp
    auth
    crtscts
    idle 1800
    mtu 1410
    mru 1410
    nodefaultroute 
    debug
    lock
    proxyarp
    connect-delay 5000
    

    Note that you must enter a valid DNS server that must be reachable by the VPN client (iPhone) through the tunnel.

    We are almost there. Now we must also configure a password for the PPP connection. Edit /etc/ppp/chap-secrets and make it look like this:

    * * thisissomesecretpassword *
    

    This password is not related to the IPSec password. I think it is wise to configure different passwords for IPSec and PPP.

    Configuring the firewall

    An IPSec + L2TP + PPP VPN requires the following ports to be opened:

    • 500/udp
    • 4500/udp
    • 1701/udp

    You must open these ports in your firewall yourself.

    Configuring traffic forwarding rules

    If you use a Linux box with IPtables, you may already have a functioning configuration. However, this line is required for traffic forwarding to work:

    iptables -t nat -A POSTROUTING -s 10.0.0.0/24 -o eth0 -j MASQUERADE
    

    You must replace the correct IP addresses according to your configuration. You may also have to enable traffic forwarding like this:

    echo 1 > /proc/sys/net/ipv4/ip_forwarding
    

    A detailed firewall configuration guide is outside the scope of this tutorial.

    If you use IPtables for your local firewall, you may be interested in my "Linux Firewall script" (shameless plug alert).

    Configuring the iPhone

    To configure a VPN profile, goto settings -> general -> network -> vpn (at the bottom). Choose 'Add VPN Configuration..."
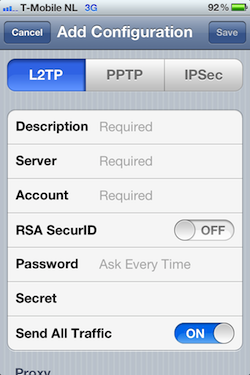
    ipsec iphone config

    1. Enter a description
    2. Enter the IP address or DNS name of your Linux box.
    3. The 'account' field can be anything you like.
    4. Leave RSA SecurID off.
    5. The Password is the PPP password configured in /etc/ppp/chap-secrets
    6. The IPSec secret (/etc/ipsec.secrets) goes into the 'Secret' field.
    7. Keep 'Send All Traffic' enabled.

    If the connection succeeds, a VPN symbol will show up in the iPhone status bar. All traffic from then on will flow through the VPN.

    It may not immediately work. Look in /var/log/auth.log and /var/log/daemon.log for debug messages.

    Once it is working properly, disable all debug settings in xl2tpd.conf and restart the daemon.

    Final remarks

    You may have to tweak the 'dead peer detection' within the IPSec configuration. When the iPhone comes out of sleep, the VPN connection cannot be reinitiated right away, which is inconvenient.

    Also, I'm not sure what the impact is on battery life.

  2. Is There an Easy and Secure Way to Transfer Files?

    Sat 17 September 2011

    Many organisations just assume that the local physical network is trusted. That their network equipment is physically secure and that it is impossible for an attacker to get on the wire and start eavesdropping on network traffic.

    Many organisations do not seem too concerned about a very old vulnerability regarding Ethernet-based networks called ARP-poisoning. Basically ARP-poisoning means that an attacker-controlled system steals the identity of another legitimate server, thus drawing all network traffic away from the legitimate server to the attacker-controlled system. Then, the attacker can do with that traffic as he or she sees fit. The attacker will be performing a man-in-the-middle attack. Please note that such an attack is trivial using tools as Cain and Abel or Dsniff.

    mitm

    It is often the case that many different server systems are placed in a single network segment or VLAN. That implies that any of these systems poses a threat to each other. It takes just one hacked system to compromise network traffic between all the other systems. This is especially a threat to all unencrypted network traffic, but encrypted sessions may also be attacked if clients don't check the sever's identity.

    sharednetwork

    Unless you've actually implemented proper network segmentation using separate (V)LANS and filter traffic between these network segments through firewalling, your environment may be at risk. In that case, please understand that it takes just one single web application containing just one vulnerability to compromise the entire environment.

    dedicatednetwork

    Not everybody has implemented proper network segmentation and firewalling, preventing these kind of attacks. And it takes quite some labour to change all that. So what can you do, assuming that you want to do something right now?

    In general, in a shared network environment, as described, the only way to make sure that data in transit is kept confidential and unmodified is to make proper use of encryption, identification and authentication.

    The solution

    To secure web traffic, there is already a fairly easy solution: using HTTPS or HTTP over SSL. The most difficult part is getting a valid SSL certificate and configuring the HTTP server to use it.

    But if you want to transfer files between servers or between clients and servers? How about that?

    Is there actually an easy way to securely transfer files between two hosts? From what I can see, the answer is "no". Security comes with some additional effort and it isn't easy.

    The first problem is to understand what 'secure' actually means. To me, it means that data is not stolen or modified by an attacker during transit.

    There are three requirements to make sure that confidentiality and integrity is guaranteed:

    1. data in transit is encrypted;
    2. the client authenticates the server;
    3. the server authenticates the client.

    Encryption prevents a man-in-the-middle attacker from eavesdropping or altering data. And if the client verifies the identity of the server, the attacker cannot impose the real, genuine server. This part may be overlooked. "I'm using SSL, thus encryption, so I am safe, right?". That is a firm negative. The client is identified with a password, passphrase or client-side SSL certificate. But how does the client identify the server? If the client doesn't verify the identity of the server, you might as well turn encryption off.

    For the Windows platform, there is no native solution. Most of the time, files are transfered using SMB and thus your files can be grabbed from the wire and you may be transferring your files to some impostor instead of the genuine host.

    The other often-used solution is FTP. And everyone knows that the biggest problem with FTP is the lack data encryption. All communication, including credentials for authentication, are transmitted in plain-text.

    Without any additional third-party software, it is impossible to securely transfer files between Windows hosts, except for one solution that I have never seen used: IPsec. IPsec is used to encrypt any network traffic between two host, thus also SMB traffic.

    The Unix world has only one solution without using third-party tools and that is transferring files using SSH as a secure transport. But SSH is also used for secure shell access to hosts and it may be difficult to prevent shell access and still allow file transfers.

    So now there is a new tendency to use FTP over SSL. You have the same inconvenience as with HTTPS: you need to install a valid SSL certificate on each FTPS server. And although this does improve security, encryption is still useless if the client side system does not properly validate the server's identity.

    Furthermore FTP uses a control channel for commands and a separate data channel to transfer the actual data. You want both channels to be encrypted, but that may not be the default. Check your FTP server's configuration to make sure this is the case.

    Implementations

    To implement FTP over SSL on Windows, you might want to take a look at the Filezilla server. An FTP server that also supports FTP over SSL. It had some security vulnerabilities in the past but not too many. To me, it is a better solution than to expose TCP-port 445 to other systems. The SMB service doesn't have a good security track-record.

    For Unix environments, take a look at VSFTPD. The Very Secure FTP daemon, is written by Cris Evans, who works on the security team for Google. The irony is that although VSFTPD itself doesn't seem to be affected by any security vulnerability itself, the hosting provider hosting the software was compromised by an the attacker. This attacker put a back-door in a specific VSFTPD release.

    Anyway, I still recommend VSFTPD as it is very well-document and the configuration is simple.

    If one of these solutions is not an option for your particular situation, you might think about using your existing insecure file transfer method on top of a VPN connection that handels authentication and encryption, such as OpenVPN. But setting up OpenVPN within such an environment may also be cumbersome.

    Recent events regarding compromised certificate authorities show that the trust model SSL-authentication often leans upon may be broken. You must be sure which certificate authorities to trust. If you have your own certificate authority, make sure you take every precaution to keep it secured.

    Question: should the client rely on build in CA certificates, the sames as present in your browser? Or are you going to configure the client to accept only the single certificate of the server?

    If you have any other suggestions for a simple solution to securely transfer files between hosts, feel free to leave a comment.

  3. Script That Deletes Old Files to Keep Disk From Filling Up

    Fri 19 August 2011

    When a disk has no free space left, all kinds of trouble can occur.

    Therefore, I've created a script that monitors the used space of a volume and deletes the oldest file if a certain threshold is reached.

    The script will keep on deleting the oldest file present on disk until used capacity is below the threshold.

    So you can tell the script to monitor volume /storage and delete old files if the used capacity is bigger than 95 percent.

    The script works like this:

    ./deleteoldfiles.sh <mount point> <percentage>
    

    The mount point represents a volume or physical disk. The percentage represents the maxium used capacity threshold.

    The script reads the output of the 'df -h' command to determine 'disk' usage.

    Example:

    bash-3.2$ ./deleteoldfiles.sh /Volumes/usb 92
    
    DELETE OLD FILES 1.00
    
    Usage of 90% is within limit of 92 percent.
    

    How let's see what happens when the threshold is exceeded.

    bash-3.2$ sudo ./deleteoldfiles.sh /Volumes/usb 92

    DELETE OLD FILES 1.00
    
    Usage of 97% exceeded limit of 92 percent.
    Deleting oldest file /Volumes/usb/a/file02.bin
    Usage of 91% is within limit of 92 percent.
    

    Here you notice that an old file is deleted and that the script checks again if there is now enough free space. If not, another file would have been deleted.

    If you have a need for it, have fun. It was a fun little scripting exercise.

    The script works under Linux and Mac OS X.

Page 36 / 73