In 2020 I wondered if I could run my blog on solar power, being inspired by Low-tech Magazine, doing the same thing (but better)1. The answer was 'yes', but only through spring and summer.
I live in an apartment complex in The Netherlands and my balcony is facing west. This means it only receives direct sunlight from 16:00 onward during spring and summer. Most of the time, the panels only get indirect sunlight and therefore generate just a tiny fraction of their rated performance. The key issue is not solar, but the west-facing balcony (it should ideally be facing south).
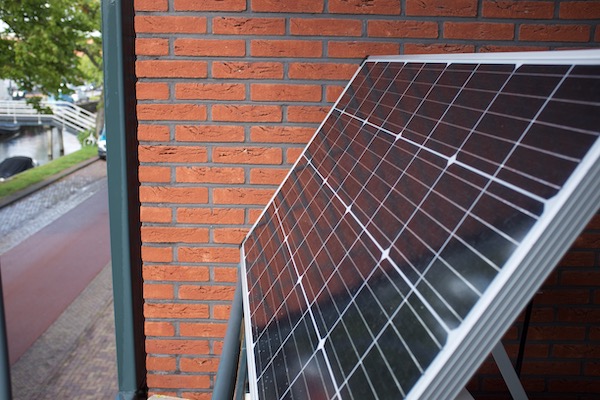 original solar panel
It's fair to say that my experiment isn't rational because of the sub-optimal solar conditions. Yet, I'm unreasonably obsessed by solar power and I wanted to make it work, even if it didn't make sense from an economic or environmental perspective2.
When I wrote my blog about my solar-powered setup, I was already on my second iteration: I started out with just a 60 Watt panel and a cheap $20 solar controller3. That didn't even come close to being sufficient, so I upgraded the solar controller and bought a second panel rated for 150 Watt, which is pictured above. With the 60 Watt and 150 Watt panels in parallel, it was still not enough to keep the batteries charged in the fall and winter, due to the west-facing balcony.
A Raspberry Pi 4B+ consumes around ~3.5 Watt of power continuously. Although that sounds like a very light load, if you run it for 24 hours, it's equivalent to using 84 Watts continuously for one hour. That's like running two 40 Watt fans for one hour, it's not insignificant and it doesn't even account for battery charging losses.
So 210 Watt of solar (receiving mostly indirect sunlight) still could not power my Raspberry Pi through the winter under my circumstances. Yet, in the summer, I had plenty of power available and had no problems charging my iPad and other devices.
As my solar setup could not keep the batteries charged from October onward, I decided to do something radical. I bought a 370 Watt4 solar panel (1690 x 1029 mm) and build a frame made of aluminium tubing5. Solar panels have become so cheap that the aluminium frame is more expensive than the panel.
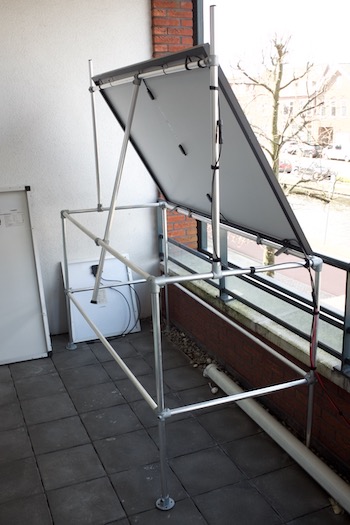
Even this 370 Watt panel was not enough during the gloomy, cloudy winter days. So I bought a second panel and build a second tube frame. Only with a 740 Watt rated solar panel setup was I able to power my Raspberry Pi through the winter6.
I didn't create this over-powered setup just to power the Raspberry Pi during the winter. I knew that solar performed much better during spring and summer and I wanted to capture as much of that energy as possible. The real goal was to go beyond powering the Pi and power my computer desk, which includes an Intel Mac Mini, two 1440p 27" displays and some other components (using around 100 Watt on average)7.
I would not be able to power my desk 24/7 but I would be happy if I can work on solar power for a few hours every other day during spring and summer. I also wanted to light my house in the evening using this setup.
The original solar setup was enough to power the Raspberry Pi and charge an iPad in the spring/summer. The solar charge controller could not handle the increased solar capacity and needed replacement. So I decided to build a new setup inspired by Will Prowse solar demo setups, which is pictured below:
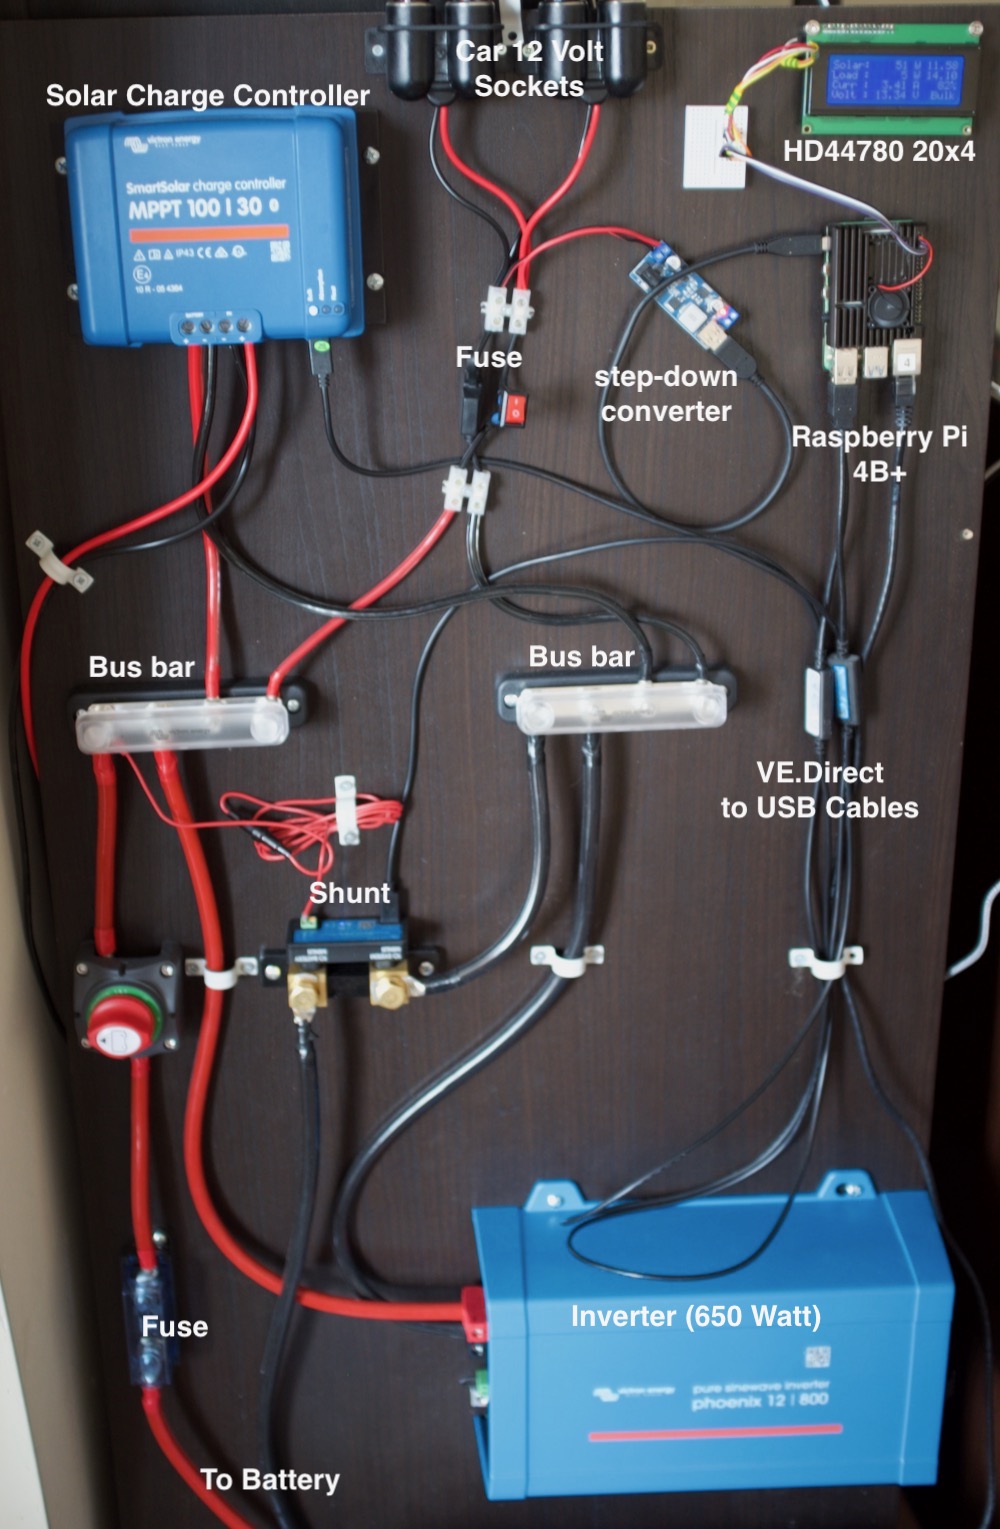 the latest iteration of my solar setup
First a brief disclaimer: I'm a hobbyist, not an expert (if you didn't notice already). I have no background in electrical systems. I've tried to make my setup safe, but I may have done things that are not recommended.
My setup is a 12-volt system9. The drawback of a 12-volt system is the relatively large currents required to charge the battery and power the inverter. This requires thicker, more expensive cabling to prevent energy losses in the cabling8.
Most components are self-explanatory, except for the shunt. This device precisely measures battery voltage and how much current is going in and out of the battery. The solar charge controller and the shunt are linked together in a bluetooth network, so the solar controller uses the precise voltage and current information from the shunt to regulate the battery charging process.
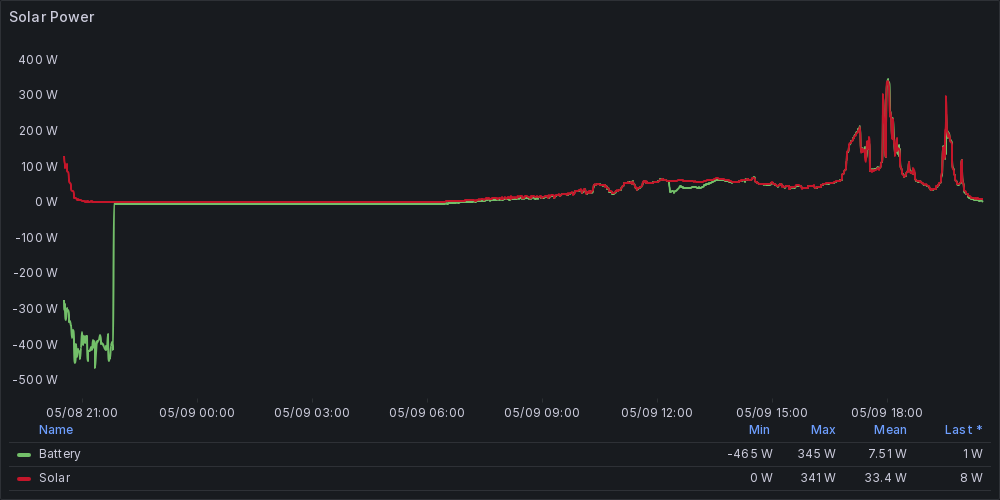
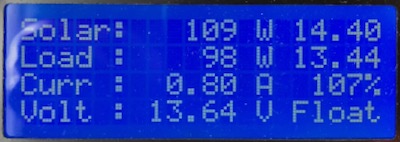
The solar controller, inverter and shunt have VE.direct interfaces (Victron-specific) which I use to collect data. I'm using a Python VE.direct module to gather this data, which just works without any issues. My Python script dumps the data into InfluxDB and I use Grafana for graphs (see below). The script also updates the 'solar status' bar to the right (or bottom for mobile users).
this image is updated periodically
The LCD display is just for fun, and mostly to keep an eye on the battery charge state.
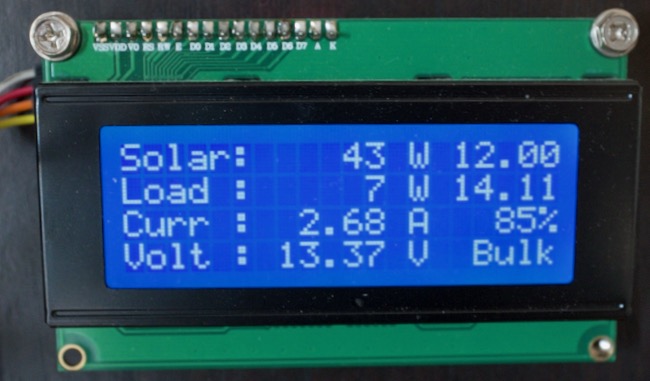 the 20x4 LCD screen
The LCD screen is managed by the same python script that dumps the VE.direct data into Grafana. I focus on two metrics in particular. First of all the daily solar yield as a percentage: 100% means the load has been compensated by solar and anything higher means an energy 'profit'. In the bottom right we see the charger status (Bulk): if it's on 'Float' the battery is full. I tend to wait for the battery to recharge to a 'float' status before I use the inverter again.
Let's talk about the battery. I've chosen to use a large used lead-acid battery even though Lithium (LiFePO4) batteries beat lead-acid in every metric.
Update May 2023: I have since upgraded to Lithium Iron Phosphate, see this blogpost for more information.
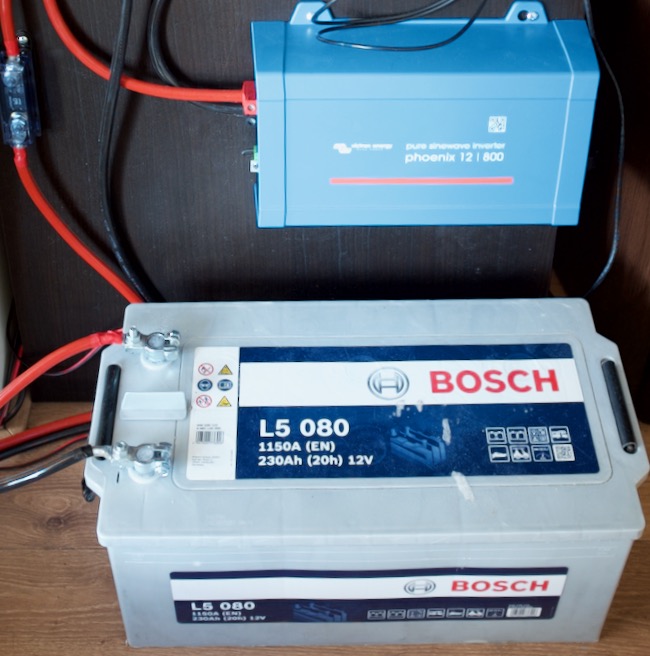 A 12 Volt 230 Ah lead-acid battery10
I bought the battery11 second-hand for €100 so that's not a significant investment for a battery. Although it's a bit worn-down and the capacity is reduced, it is still good enough for me to run my computer setup for 10 hours after a full charge12. In practice, I won't use the battery for more than four to five hours at a time because recharging can take multiple days and lead-acid batteries should ideally be fully recharged within 24 hours or their aging is accelerated.
The lead-acid battery also serves another purpose: is a relatively cheap option for me to validate my setup. If it works as intended, I might opt to upgrade to lithium (LiFePO4) at some point.
Until recently, switching between the grid and solar for my computer setup was quite cumbersome. I had to power down all equipment, connect to the inverter and power everything up again. That got old very quickly. Fortunately, I stumbled on an advertisement for a Victron Filax 2 and it turns out that it does exactly what I need.
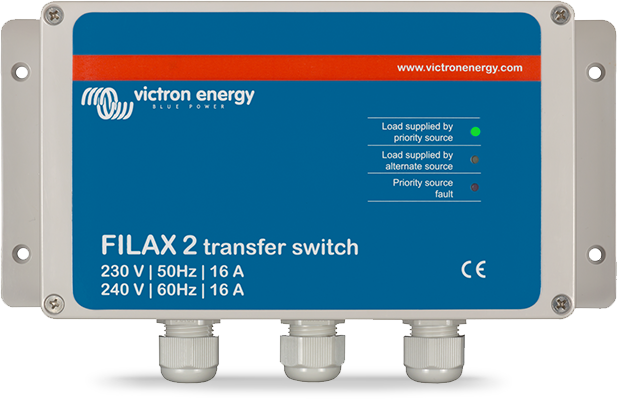
The Filax 2 switches between two 230 Volt input sources without any interruption, like a UPS (Uninterruptible power supply). Now that I've installed this device, I can switch between solar and grid power without any interruption. Brand new, The Filax 2 costs €350 which was beyond what I wanted to spend, but the second-hand price was acceptable.
My solar setup is not something that I can just turn on and forget about. I have to keep an eye on the battery, especially because lead-acid should ideally be recharged within 24 hours.
Happy case: the battery is full and my computer desk is 100% solar-powered
It's now April 2023 and my setup seems promising. Peak output of the two 370 Watt solar panels facing west was 230 Watts. Only for a very short period, but it makes me confident for spring and summer. I could automate enabling and disabling the inverter, with a relay and some logic in Python, but for now I'm good with manually operating the inverter.
You may have noticed that I've used a lot of Victron equipment13. Mostly because it seems high-quality and the data interfaces are documented and easy-to-use. The inverter was also chosen because of the low parasitic load (self-consumption) of around 6 watt. Victron equipment is not cheap. Buying Victron gear second-hand can save a lot of money.
Speaking of cost, if I include all the cost I made, including previous solar projects and mistakes, I think I spend around €2000.
That's all I have to say about my hobby solar project for now.
Link to Hacker News thread about this article.
-
Their attempt was quite serious and precise. They accounted for the energy used to produce the equipment. They went as far as dithering images to reduce bandwidth and thus energy usage. ↩
-
The cost can never be reclaimed by the electricity savings. Also, the energy produced to make all the components would never be recovered due to my west-facing setup. ↩
-
never buy those cheap non-MPPT solar charge controllers unless you really know what you are doing. You are better off with a MPPT controller which is much better at getting the most energy out of a solar panel. ↩
-
Jinko half cut 120 cell 370 WP JKM370N-6TL3-B ↩
-
I have absolutely no experience with designing and building aluminium tube frames. After you're done laughing at this contraption, if you have a better, more efficient design, I'm still interested. ↩
-
I may have cheated once by recharging the battery from the grid just to protect it against accelerated aging due to being in a prolonged (partially) discharged state. ↩
-
Suddenly you realise that making the background on all monitors black saves ~20 Watt. My blog should be dark-themed to reduce energy usage 😅 ↩
-
I've actually oversized the battery cabling for safety reasons. If a length of cable isn't rated for the current flowing through it, it becomes a resistor, generating heat, which can cause a fire so I want to be carefull. ↩
-
If you ever intend to build some kind of solar setup yourself, consider a 24 Volt or ideally an 48 Volt system to reduce currents and thus save on cabling cost. ↩
-
The + and - pole are temporary uncovered for this picture, but normally they are covered to prevent a short-circuit if anything would fall on the poles. ↩
-
A sealed lead-acid battery like the one I'm using is safe and won't release any (explosive) gasses unless overcharged or abused. ↩
-
The inverter uses a dynamic load algorithm to prevent deep discharge of the battery. Ideally a lead-acid battery should never be discharged beyond 50% of capacity and it seems to work perfectly. Dumb inverters, just discharge until 10.5 volt under load, which means the battery is almost depleted, causing rapid aging and significantly reduced life-span. ↩
-
No, I'm not sponsored by Victron, I wish 😅💸 ↩

Comments